
















You walk out to the car, catch the light on the door or bonnet, and there it is. A thin mark that wasn’t there yesterday. Most light scratches look worse than they are, but plenty of DIY jobs go wrong because people start rubbing paint before they’ve worked out what kind of damage they’re dealing with.
That first judgement matters more than the product you buy. A true light scratch removal car job is usually about correcting the clear coat safely, not attacking the panel with the strongest compound you can find. In Perth, I see more trouble caused by poor washing and overzealous DIY polishing than by the original scratch itself.
First Assess the Damage Is It a DIY Job
The biggest mistake is assuming every visible mark needs the same fix. It doesn’t. Before you touch a compound, towel, or applicator, check whether the scratch is sitting in the clear coat or has gone deeper.
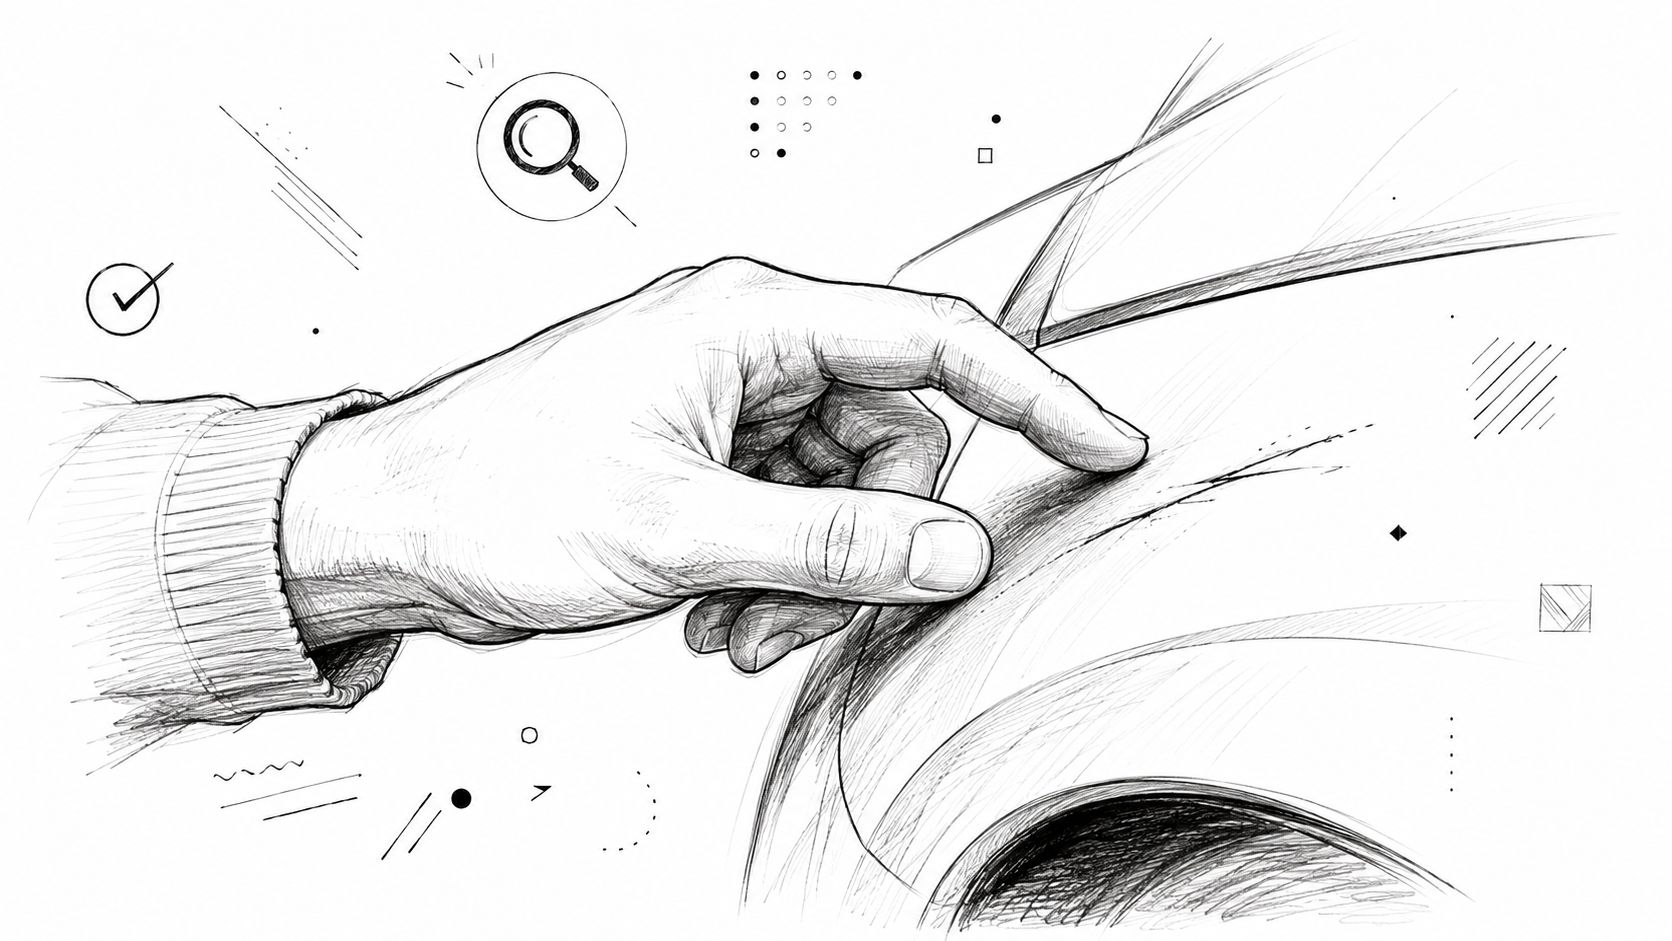
Use the fingernail test properly
Wash the area first so you’re not feeling grit. Then lightly drag a clean fingernail across the mark.
If your nail doesn’t catch, you’re usually dealing with a light defect in the upper surface. For scratches confined to the clear coat, professional polishing in Perth typically costs $50–$150 AUD, and DIY success is generally high when the fingernail test shows no snag, according to this guide on car scratch repair options.
If your nail does catch, stop treating it like a quick polish job. That usually means the scratch has enough depth that hand correction becomes less predictable and DIY results drop off sharply.
Practical rule: If the scratch catches your nail, your first goal is no longer “remove it completely”. Your goal is “avoid making it worse”.
A lot of owners push harder at this point. That’s exactly when they create a dull patch around the scratch, thin the clear coat too much, or expose the difference between corrected and uncorrected paint.
What the paint layers mean in practice
You don’t need to memorise a body shop textbook, but you do need a simple mental model:
| Layer | What it does | What a scratch here usually means |
|---|---|---|
| Clear coat | Protects gloss and colour | Often suitable for light polishing by hand |
| Colour coat | Gives the panel its colour | Usually needs touch-up work or more advanced correction |
| Primer or below | Foundation under paint | Not a basic DIY polish job |
A light scratch removal car job is really about levelling or refining the surrounding clear coat so the defect becomes hard to see. It is not about grinding away at the panel until the line disappears at any cost.
Look at the mark from a few angles. A clear-coat scratch often looks sharp under direct light but fades when you change position. A deeper mark tends to stay visible from almost every angle and may show a change in colour or texture.
Use this quick decision list before you begin:
- DIY is reasonable when the mark is narrow, your fingernail glides over it, and the surrounding paint still looks intact.
- Proceed carefully when the scratch is visible but borderline on the fingernail test.
- Call a professional when the mark catches clearly, covers a larger area, or sits near an edge, crease, badge, or trim piece.
That short assessment can save you a lot of money and a lot of clear coat.
Your DIY Toolkit and Essential Preparation
Good scratch correction starts with control. If the panel is dirty, the towel is rough, or the product is too aggressive, a light scratch can turn into a larger patch of haze and swirl marks.
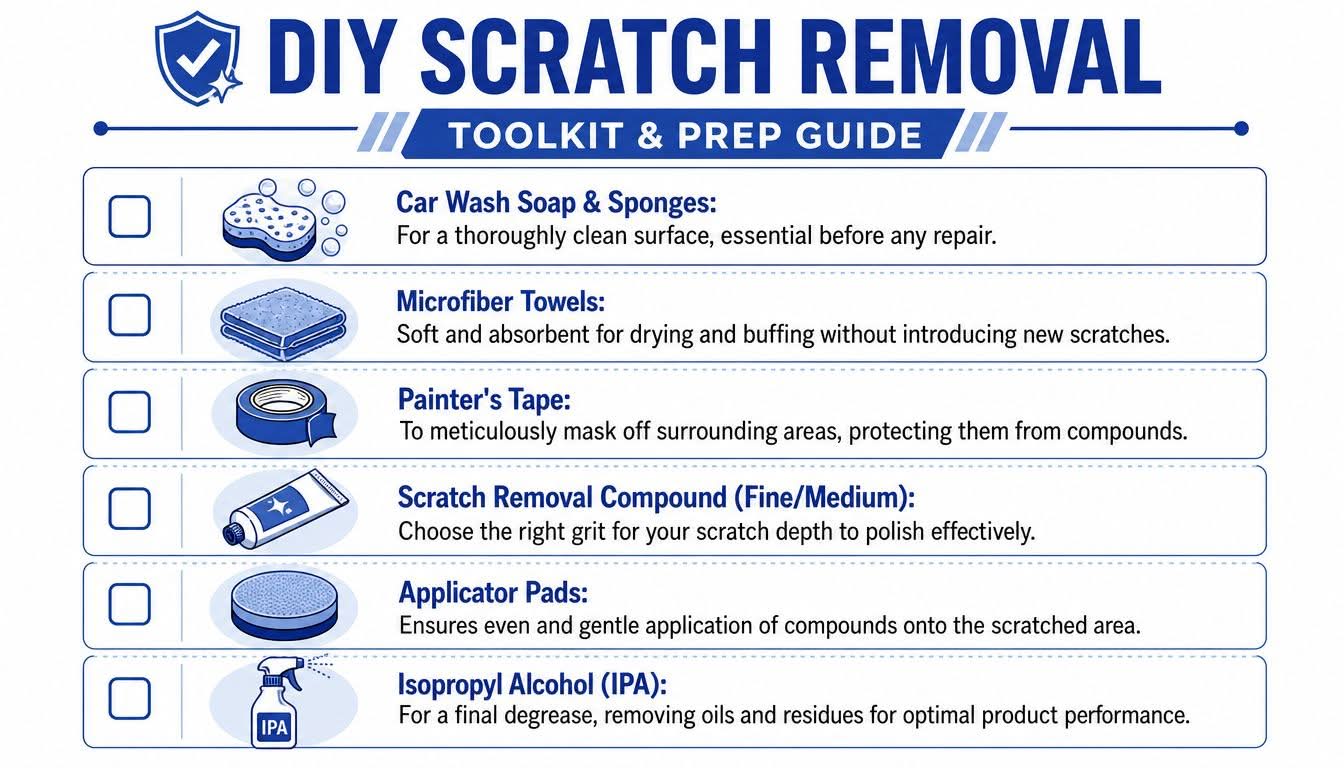
What You Need
Keep the kit small and clean. For hand work, a few decent items beat a shelf full of random bottles.
- Proper car wash soap and clean wash media. The panel needs to be free of grit before you touch the scratch.
- Several quality microfibre towels. Use separate towels for drying, product removal, and final wipe-down.
- Painter’s tape. It protects trim, badges, rubber, and sharp edges where clear coat is thinner.
- A mild scratch remover or light polish. Start with the least aggressive option that suits a light clear-coat defect.
- A foam or microfibre applicator pad. This gives you more even pressure than wrapping a cloth around your finger.
- A panel wipe or paint-safe degreaser. Handy for stripping leftover polishing oils so you can check the result under light.
Cheap towels cause a lot of DIY problems. If a towel feels rough, drags across the paint, or drops lint, keep it away from the panel.
If you already know the mark is beyond a light hand polish, stop there. A proper cut and polish service for deeper paint correction is safer than chasing the scratch by hand until the area looks duller than the defect.
Prep work that prevents extra damage
Wash and dry the area thoroughly before you open the polish. Any dirt left behind becomes abrasive the moment you start rubbing. I see this often on dark cars. The original scratch stays, but the owner adds a patch of fresh swirls around it.
Work in shade on cool paint. Hot panels make product flash off too fast, which shortens your working time and makes pressure harder to manage.
Tape off nearby trim, textured plastics, panel edges, and badges. That small step saves a lot of cleanup and helps you keep your correction tight and controlled. It also reduces the risk of creating obvious polished spots beside older, uncorrected paint.
Then inspect the area under strong light. A mark that passed the fingernail test can still sit in a patch of wash marring, and that changes how careful you need to be with your towel choice and hand pressure. If the surrounding paint already shows swirl marks, treat the whole area gently. Poor prep and dirty wash habits are often the reason those fine circular marks appear in the first place, which is why a proper hand wash matters before any correction attempt.
A Practical Guide to DIY Scratch Removal by Hand
You wash the car, catch the panel in Perth sun, and one light scratch keeps pulling your eye. If it passed the fingernail test, hand correction can improve it. If it did not, stop before you thin the clear coat around a mark that needs machine work or repainting.
Hand work is about control. The aim is to reduce how obvious the scratch looks in normal light, not to grind away at the panel until the finish turns patchy.
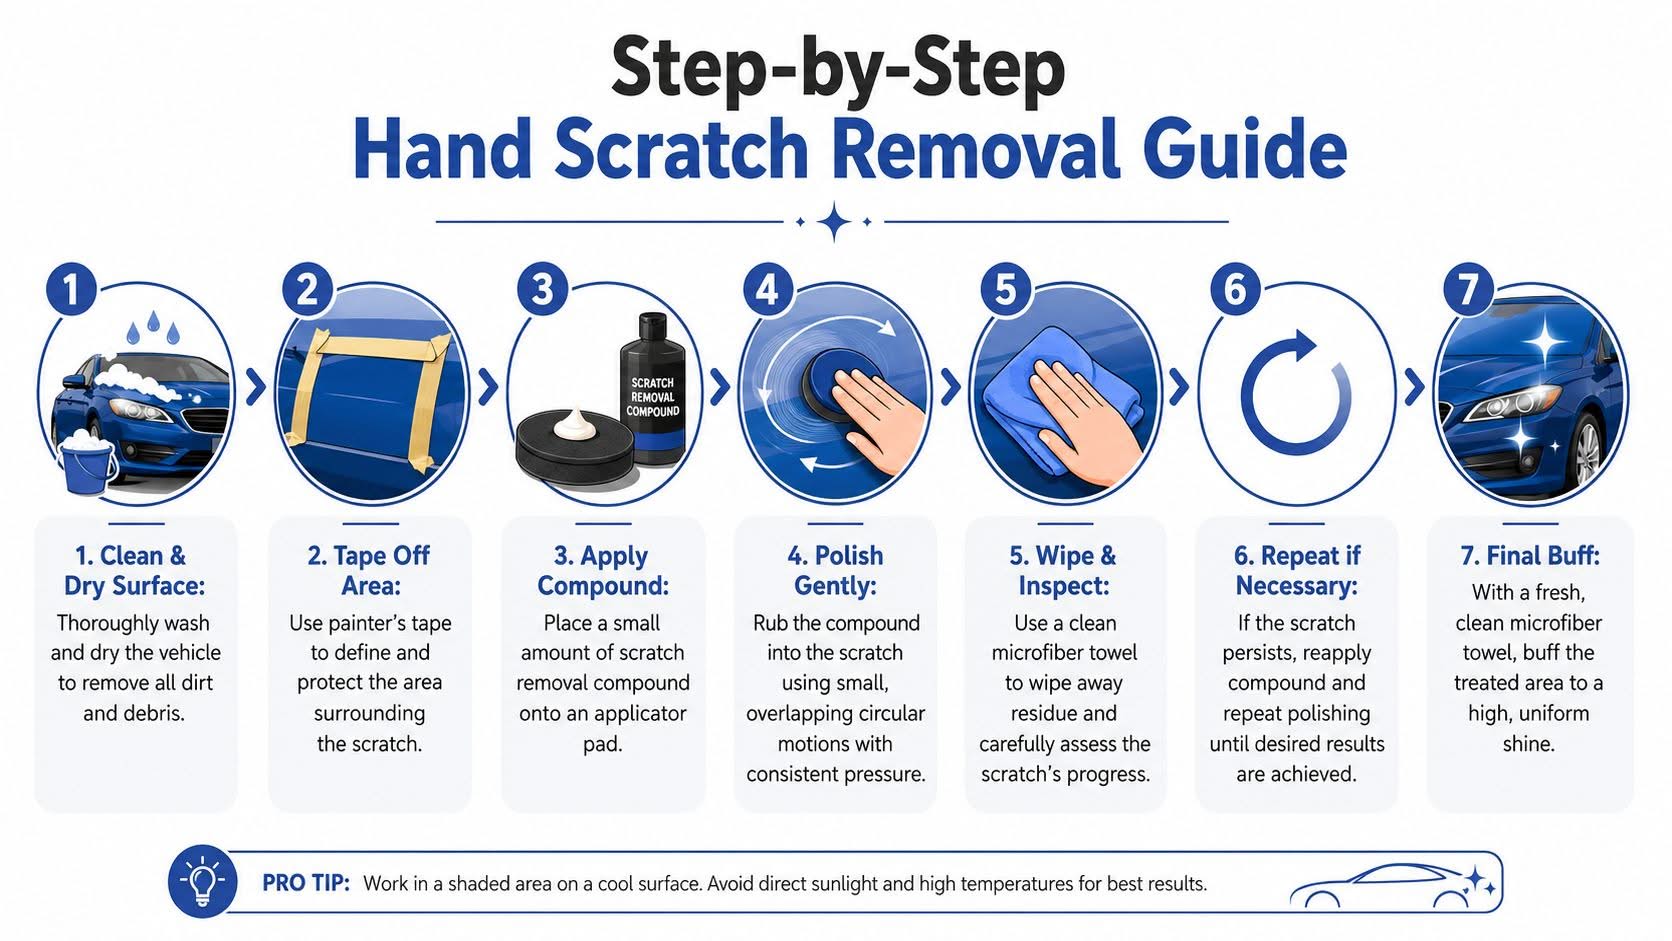
The hand method that works
Use a small amount of product on a soft applicator or clean microfibre towel. Work a modest area around the scratch, not half the panel, using short overlapping passes and steady pressure. I would rather see two careful rounds than one long aggressive one.
A practical sequence looks like this:
- Apply a small amount of scratch remover or light compound to your applicator.
- Work the defect and the paint just around it in small overlapping circles or short crosshatch passes.
- Keep the pressure even so you are polishing the surface consistently instead of digging into one spot.
- Stop after a short cycle once the residue starts to haze or thin out.
- Buff off with a fresh towel and inspect in direct light from more than one angle.
- Repeat only if the scratch is clearly improving.
The big mistake is chasing instant removal. Hand polishing is slower than machine correction, which is a good thing for a beginner, but it also means progress can be subtle. If one pass softens the line and improves the reflection, you are heading in the right direction.
How to judge progress without overdoing it
Check the scratch after every short round. Wipe the area properly before you decide what changed, because leftover polish can fill the mark and make it look better than it really is.
Good signs include:
- The scratch looks softer and less sharp at the edges
- Reflections across the area look more even
- You have to change your viewing angle to find the mark
Stop if you see any of these:
- Cloudiness or fresh haze around the repair spot
- A polished patch that stands out from the rest of the panel
- No real improvement after a few careful passes
That last point matters. A lot of drivers think they have one isolated scratch when the panel is covered in light wash marring and swirl marks. In that case, spot polishing by hand often leaves one clearer patch surrounded by the same old defects. A professional cut and polish service for broader paint correction makes more sense when the problem is bigger than one line.
Swirl prevention matters here too. You can correct a light mark by hand, then put fresh circular scratches back into the paint the next time you wash with a rough mitt, dusty towel, or poor technique. That is why the fingernail test is only the first decision. The second is whether your wash habits are good enough to protect the result.
Avoiding Common DIY Paint Repair Pitfalls
The easiest way to make a light scratch look worse is to misread what you are seeing. After the fingernail test, the next question is whether you have one small defect or a whole panel full of wash marring.
A lot of Perth cars come in with what owners describe as a random scratch on the door or bonnet. In full sun, it turns out to be swirl marks and fine circular washing damage spread across a much larger area. The distinction is important because the fix is different. A single light line can often be improved by hand. A panel covered in swirls usually needs a more even correction approach, otherwise you end up with one clearer patch surrounded by the same old haze.
Many “mystery scratches” start during washing and drying, not in the car park.
That is why DIY results can look good for ten minutes, then disappointing once the panel is outside again. The product has filled the mark a bit, but the surrounding swirls are still there.
Mistakes that turn a small mark into a bigger repair
These are the ones that cause the most trouble:
- Using too much compound. More product does not mean more cut. It usually means less control and more residue to chase.
- Skipping masking. Trim, badges, and textured plastics stain fast and are awkward to clean once product dries in them.
- Polishing over dirt. Any grit left on the paint can add fresh marks while you work.
- Hammering one tiny spot for too long. That can leave a patch that looks brighter or hazier than the surrounding paint.
- Treating every mark like a scratch. Some lines are just transfer, towel marring, or wash-induced swirls.
- Using poor wash gear after the repair. A rough mitt or dusty drying towel can put fresh circular marks straight back into the clear coat.
I see one mistake more than people expect. They chase a visible line without checking the rest of the panel under proper light. By the time they stop, the original scratch is softer, but the area around it has fresh haze from overworking the paint by hand.
Clear coat is limited. On a true light scratch, the goal is to refine the defect with the least aggression needed. If the mark is not responding after a few careful passes, stepping up pressure or reaching for sandpaper is usually the wrong move for a DIY job.
Stop if the area turns cloudy, the finish starts looking uneven, or the repair spot stands out from the rest of the panel. At that point, effort is no longer the problem. Technique, product choice, or the original damage is.
When to Call the Professionals in Perth
There’s nothing wrong with doing a minor correction yourself. There is something wrong with forcing a DIY answer onto damage that needs proper paint repair.

Jobs that should not stay DIY
Call a professional when the scratch catches your nail clearly, sits across a body line, has visible colour loss, or covers more area than a simple hand correction can blend neatly. Those jobs often look manageable at first and then unravel once you start trying to chase perfection.
In Australia, the cost to professionally repair a light surface scratch ranges from $150 to $300 AUD, while deeper paintwork can exceed $1,000 AUD, and mobile SMART repair services in Perth can handle smaller jobs on-site, often within a couple of hours, according to AutoGuru’s scratch repair overview.
That pricing gap is useful because it helps frame the decision properly. A small clear-coat issue might be worth a careful DIY attempt. A deeper or wider defect usually isn’t, especially if your alternative is turning a moderate repair into a repaint.
What professional correction changes
Professional correction isn’t just “doing the same thing harder”. It changes the tools, the consistency, and the finish control.
A proper cut and polish addresses broader light scratches, swirls, and oxidation with machine polishing after paint prep. That’s very different from rubbing one mark by hand and hoping the surrounding gloss matches. On a dark car especially, panel uniformity matters as much as the scratch itself.
Use this quick comparison:
| Situation | DIY by hand | Professional help |
|---|---|---|
| Single faint clear-coat mark | Often suitable | Optional |
| Scratch catches fingernail | Risky | Recommended |
| Panel full of swirls and haze | Limited result | Better fit |
| Need seamless finish for resale or pride of ownership | Hard to guarantee | Better fit |
If you want a local option for swirl and light scratch correction, Prime Shine Hand Car Wash in Westminster offers a cut and polish service that includes paint preparation and machine polishing as part of its detailing menu.
The practical question is simple. Are you trying to make a minor mark less noticeable, or are you trying to restore the finish properly? Those are two different jobs.
Long-Term Paint Care and Scratch Prevention
Scratch removal is satisfying. Not needing scratch removal is cheaper.
Washing habits that protect the clear coat
Most light defects I see could have been avoided with gentler washing. Rinse thoroughly before touching the paint. Use clean wash media. Swap out dirty towels instead of pushing on with the same one. Dry with soft microfibre rather than anything rough, tired, or contaminated from previous jobs.
If you’ve just corrected a scratch, protect the area afterwards. Leaving freshly polished paint bare makes it more vulnerable to the same cycle repeating.
Protection matters more in Perth conditions
In Western Australia, high UV exposure accelerates clear-coat oxidation, which makes proper treatment and follow-up protection important for paint longevity, and many DIY attempts fail because they remove too much clear coat instead of levelling or filling the defect correctly, as discussed in this explanation of clear-coat scratch treatment.
That’s why prevention isn’t just about avoiding marks from washing. It’s also about slowing down the environmental wear that makes paint more fragile over time.
For longer-term defence, regular protective care helps, and a dedicated ceramic coating service can add a more durable barrier that makes the surface easier to clean and maintain. It won’t make the car immune to damage, but it does make sensible maintenance easier and more consistent.
Good paint care is mostly restraint. Wash gently. Correct only what needs correcting. Protect what you’ve already saved.
If your paint has light scratches, wash-induced swirls, or dull patches that aren’t responding well to DIY work, Prime Shine Hand Car Wash offers hand washing, detailing, cut and polish, and paint protection from its Westminster location. Book a service if you’d rather get the finish corrected cleanly than risk thinning the clear coat chasing the last mark by hand.