






A car detailing clay bar is a pliable bar of synthetic clay resin that is glided over lubricated paint after washing to lift bonded contaminants, leaving the surface smooth and ready for polish or protection. So why do so many owners clay clean paint on a fixed schedule, then wonder where the new fine marks came from?
That question matters because claying is useful, but it isn’t harmless by default. If you drag clay over paint that doesn’t need it, you’re adding contact and possible marring for no benefit.
The safer habit is simple. Wash first, test the paint by touch, identify what’s stuck to it, and clay only the roughness that remains.
Run the bag test before you book or buy anything. Let the paint tell you what’s needed.
What Is a Car Detailing Clay Bar and How Does It Work?
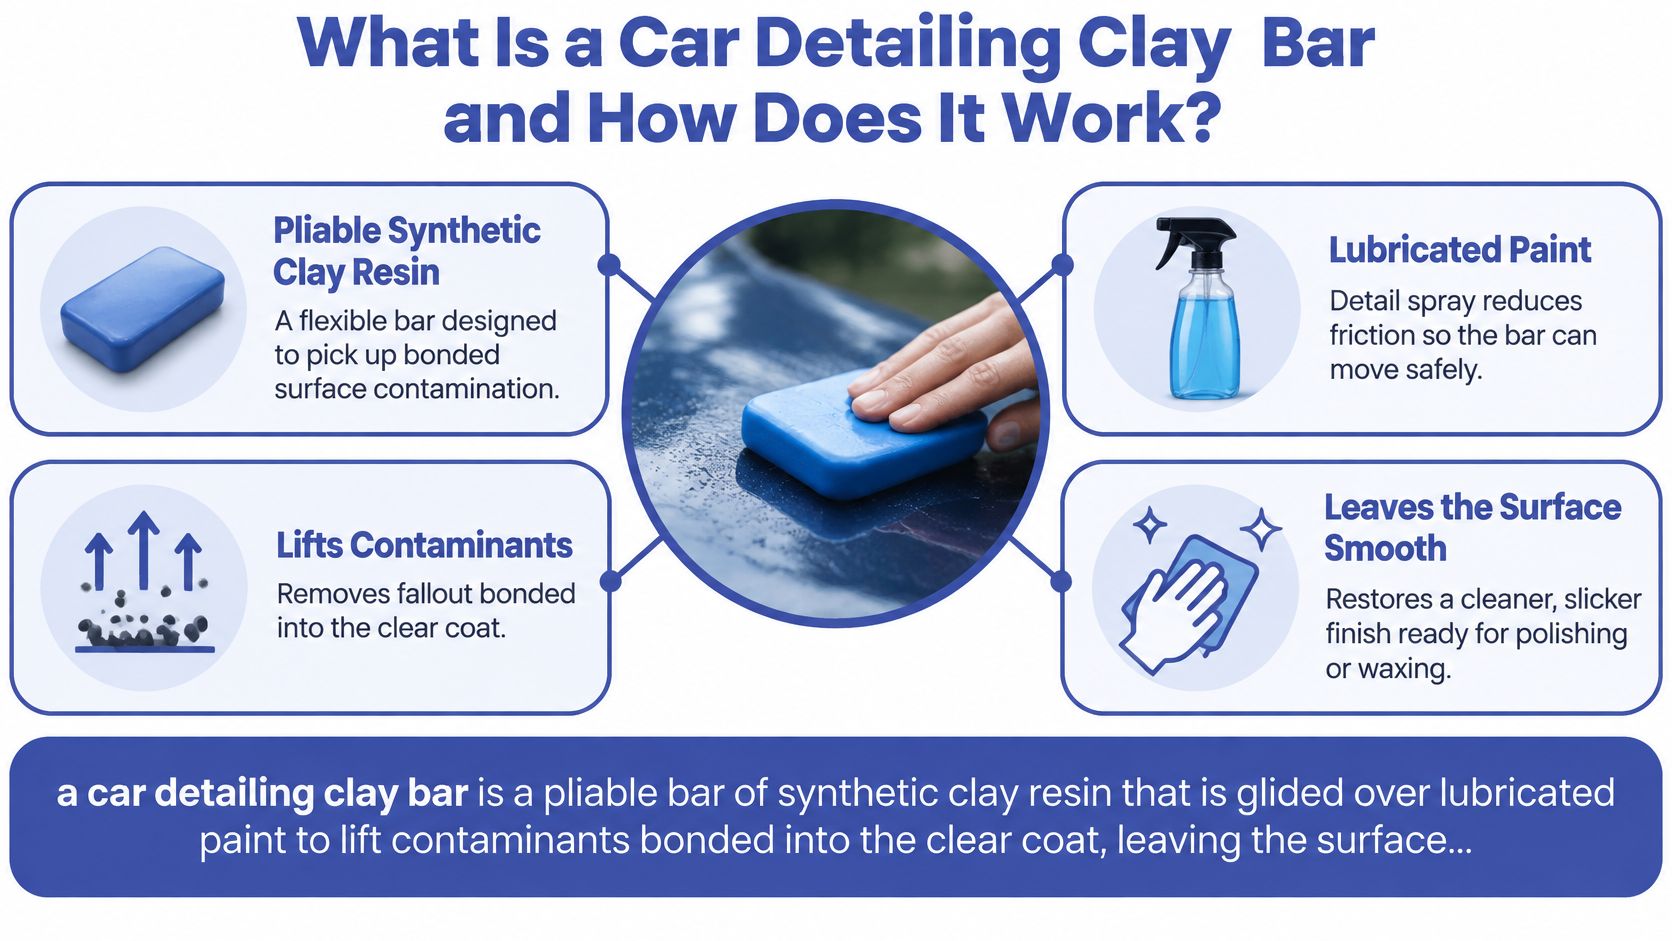
A car detailing clay bar is a pliable bar of synthetic clay resin that is glided over lubricated paint to lift contaminants bonded into the clear coat, leaving the surface smooth. It is a mechanical decontamination tool, used after washing and before polishing or protection.
A clay bar works like a lint roller on a wool jumper: brushing lifts loose lint easily, while stubborn fibres stay caught in the weave until a sticky surface pulls them free. Paint behaves in a similar way. Shampoo removes loose soil, yet tiny particles can remain physically attached to the clear coat, which is why clean paint can still feel rough.
If roughness remains after washing, Prime Shine Hand Car Wash offers Cut & Polish, which includes an exterior wash, clay bar or paint preparation, and machine cut and polish.
How the Bar Grabs Contamination
First, you spray a generous film of clay lubricant onto a cool panel. That wet layer lets the bar slide instead of dragging, which reduces friction on the clear coat.
Next, the soft face of the clay deforms slightly around each raised particle as it passes over it. The particle sticks to the clay and pulls away from the paint, then you fold the bar inward so the contamination is trapped inside and a clean face touches the car. Light pressure matters here. Firm pressure does not clean faster; it only increases the chance of fine marring.
Keep the panel wet and the pressure light. If the bar grabs or squeaks, stop and add lubricant.
The SONAX Australia clay guidance describes synthetic resin or rubberised clay worked across a thoroughly lubricated panel to pick up industrial fallout, brake dust particles, overspray, tree sap, tar and insect residue. It also recommends shade, cool paint, light pressure and short straight line movements, because clay on an unlubricated surface increases drag and the likelihood of marring.
Washing removes loose soil, while claying removes what is still physically bonded after washing.
That distinction sets the correct sequence. You wash, clay, polish, then protect, and each step does a different job. Tar removal and chemical iron decontamination handle specific deposits; claying is for the residual roughness that can remain on paint, glass and hard chrome after cleaning.
The key judgement is timing. Claying earns its place when washed paint still feels gritty, because that texture points to bonded contamination. On smooth paint, the same step adds contact without adding benefit, so the safer default is to test first and clay only the panels that need it.
Does Your Car Need a Clay Bar Treatment?
The calendar can’t tell you whether your paint needs claying. Your paint can, and the bag test is how you read it, once the car has been washed and dried properly.
Put a clean plastic bag over your hand and glide it lightly across a flat panel, such as the bonnet or a front guard. The thin plastic works like an amplifier for your fingertips, picking up tiny bumps that bare skin tends to smooth over. Grit that survives a proper wash points to bonded contamination still sitting on the clear coat.
Wash, dry, then test two or three panels. Clay only the panels that feel rough.
Signs Claying Is Worth Doing
- Gritty paint after washing: The panel looks clean but feels sandy under the bag.
- Dull finish despite regular washing: Bonded film can flatten gloss before you polish or wax.
- Wax that won’t spread evenly: Protection grabs or smears because grit sits on the surface.
- Flat water behaviour: Water sheets or beads weakly instead of forming tight beads.
- Sticky or spotted patches: Tree sap can leave tacky spots on horizontal panels.
- Orange specks low on the car: Small rust coloured dots suggest iron fallout near wheels and rear panels.
Daily exposure raises the odds. Parking under trees, regular trips near industrial sites, long highway drives and Perth dust episodes all feed contamination onto the paint. The Perth air quality report card identifies natural dust, smoke haze and local vehicle emissions as major contributors to higher PM10 concentrations in Perth, with PM10 meaning particles 10 micrometres or less in aerodynamic diameter. Those particles settle on paint and combine with road film, so rinsing alone can leave a gritty layer behind.
If roughness keeps showing up in the bag test, a Cut & Polish (from $249) includes a clay bar or paint preparation step before the machine polish.
A smooth result means the opposite. If the bag glides cleanly, that panel doesn’t need clay, and running a bar over it anyway adds abrasion for no gain. That is the over-claying trap: every pass carries a small risk of marring, so claying paint that is already smooth spends clear coat for nothing.
Practical rule: Clay when the surface is rough. Polish when it’s smooth but dull or marked.
There’s no fixed schedule for how often to clay. A daily driver in Perth may pass the bag test one month and fail it the next after dusty weather or a long country drive, so let each wash and test decide. One rough panel is reason enough to clay that panel alone, never the whole car.
Test after every proper wash, not by the date. A panel that still feels gritty has earned the clay. A smooth one has earned a pass.
What Is Stuck to Your Paint?
Contaminants behave like different stains on fabric. Grease, mud and ink each need a different remover, and paint contamination works the same way. Treating every rough patch as generic dirt is where owners go wrong, because dragging the wrong particle across clear coat can create the marks you are trying to avoid.
| Contaminant | Typical source | First step |
|---|---|---|
| Iron fallout | Brake dust, rail and industrial dust, orange or brown specks | Iron remover, rinse, then clay |
| Tar | Road surfaces and bitumen, dark spots on lower panels | Tar remover, then clay if roughness remains |
| Tree sap | Parking under trees, sticky amber spots | Sap remover, then clay gently |
| Overspray | Nearby paint work, fine dry speckles | Clay with a fine bar, polish if the paint is etched |
| Mineral dust and road film | Perth dust, traffic, dry seasons | Thorough wash, then clay |
| Insect residue | Highway driving, front bumper and mirrors | Soak with lubricant, then clay gently |
| Bonded fallout and acid rain residue | Industrial areas, rain exposure, rough texture | Medium bar with heavy lubrication, then check for etching |
Spot orange specks or sticky patches? Treat those chemically before any clay touches the paint.
Matching the Remover to the Contaminant
Each remover is built for one job. Iron remover reacts with ferrous particles, tar remover softens bitumen, and sap remover breaks down resin, so a single product will not cover all three. The Waxit clay bars guidance supports a chemical first, clay second approach, noting that clay mechanically abrades contamination and can create light swirl marks while chemical removers can dissolve some contaminants more safely.
Once the chemical step is done, test the panel again. If the surface glides smoothly, the job is finished and claying would only add abrasion to a clean finish. For routine surface buildup that isn’t fallout, our guide to car paint cleaning treatment options for Perth drivers helps you separate cleaning from correction.
Unsure whether it’s fallout or a defect? Check the panel under a torch at an angle before treating it.
A Six Step Inspection Workflow
- Wash the car thoroughly and dry it.
- Run the bag test on several panels.
- Look closely for orange or brown specks and sticky patches.
- Treat iron and tar with the right chemical remover and rinse thoroughly.
- Clay only remaining roughness with plenty of lubricant.
- Polish if marks remain visible after decontamination.
The main risk is impatience. Clay used on heavy fallout or dry paint can drag grit across the clear coat and leave light marring, especially on dark colours. Some flaws aren’t contamination at all. Etching from bird droppings, swirl marks and stone chips sit in the paint rather than on it, so they need polishing or touch-up work instead of clay.
Follow the workflow in order. Skip claying if chemical treatment already leaves the paint smooth.
Explore Paint Preparation Services
How Do You Clay a Car Step by Step?
Start by matching the bar to the contamination. The Waxit clay bar specifications estimate that one fine clay bar can service about three vehicles depending on surface condition, while a 200 g medium or aggressive bar is intended for heavier fallout, acid rain residue, road grime and industrial dust.
A fine bar suits light bonded dirt on a regularly maintained car. A stronger bar lifts heavy contamination faster, but it also raises the risk of fine marring that needs polishing afterwards, so don’t choose aggressive clay just to save time.
Choose the mildest bar that does the job. Heavy fallout or dark paint is a good reason to book help.
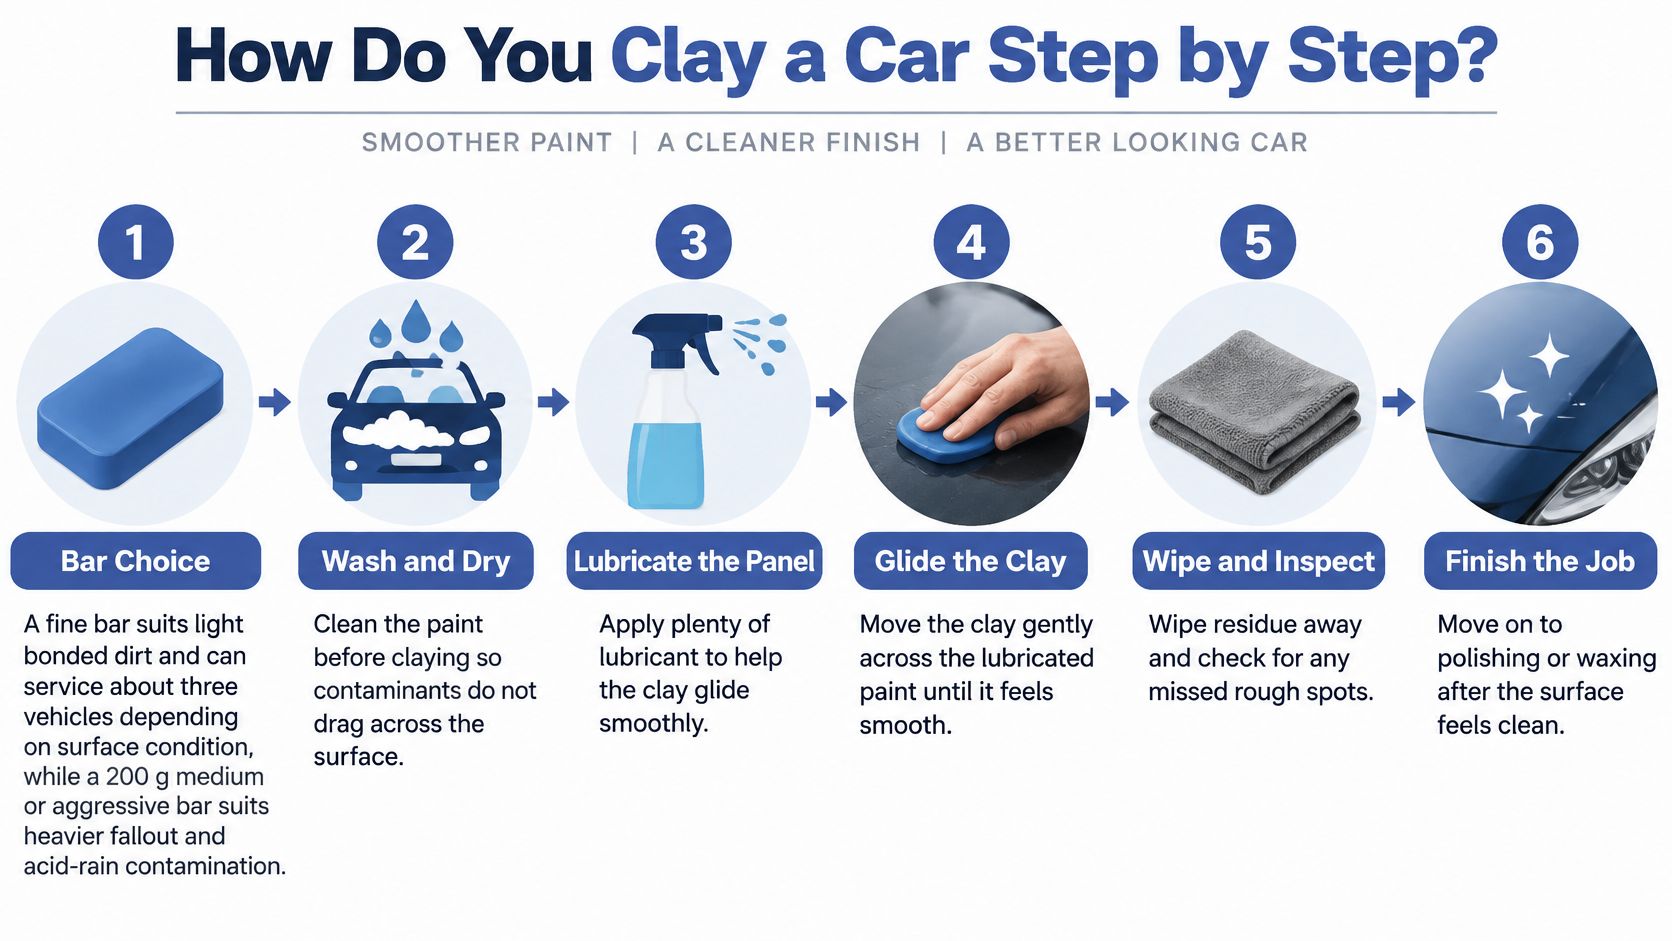
The Claying Routine
- Work in shade on a cool panel. Take one small section at a time, such as half a bonnet, so lubricant doesn’t dry out. Heat and sun shorten your working time.
- Spray lubricant generously. The surface should stay visibly wet during every pass. Add more as soon as the bar starts to drag.
- Flatten the clay into a pancake. Knead a small piece until it’s pliable, then shape it to fit your fingers. A flat pad gives even contact without hard edges.
- Glide in short straight lines. Use light pressure and overlap each pass slightly. Don’t use circles, because straight passes are easier to control and inspect.
- Listen and feel for the change. Contaminated paint often feels grabby at first. When the bar moves freely and smoothly, that section is usually clean.
- Fold to a clean face often. When the clay picks up colour or stops gliding smoothly, fold it inward or replace it. Never keep rubbing a dirty face over paint.
- Wipe and inspect. Remove residue with a clean microfibre, then check by touch and angled light. Repeat the bag test before you move on.
Work small, keep it wet, and inspect each section. Rush is where marring starts.
Where Iron Remover Fits
If you suspect ferrous fallout, use an iron remover before or with claying. Allow approximately one minute for the iron reaction, then lubricate the clay tool and rinse thoroughly, following the product directions for the surface you’re treating.
That chemical step reduces the amount of hard material the clay must pull free. It also improves polishing efficiency later, because particles left on the paint can interfere with a polishing pad.
Seeing a colour change from iron remover? Rinse well before you clay the remaining roughness.
Mistakes That Cause Marring
- Claying dry or nearly dry: Too little lubricant creates drag.
- Pressing hard to go faster: Pressure doesn’t clean better, it increases marking.
- Reusing dropped clay: Discard a dropped bar because it now holds grit from the ground.
- Skipping iron treatment: Heavy fallout gets dragged instead of dissolved first.
- Working too large an area: Lubricant dries before you finish the section.
After claying, dry the panel and apply wax, sealant or ceramic protection promptly. Remaining bonded contamination acts as a physical barrier that reduces coating or sealant bonding and durability, and freshly clayed paint has little protection left on it.
Finished claying? Protect the paint the same day, or book polish and protection together.
What Can a Clay Bar Fix and What Can’t It?
Clay only lifts material sitting on the paint, so it cannot repair damage within the paint. A useful mental model is a sticky eraser on a gritty tabletop: it picks up the grit, while marks carved into the wood stay put. If the bag test already left the panel smooth, extra passes are not deeper cleaning; they are extra chances to add light marring.
| Defect | Does a clay bar fix it? | What fixes it |
|---|---|---|
| Bonded contaminants | Yes | Clay bar after chemical treatment |
| Rough texture after washing | Yes | Clay bar |
| Light swirl marks | No, claying can add light marring | Machine polish |
| Fine scratches | No | Cut and polish |
| Light water spots | Partly, only if mineral deposits are bonded | Clay, then polish if marks stay |
| Heavy water spots and etching | No | Machine correction |
| Dull, oxidised paint | No, claying removes only loose residue | Polish, then protection |
If you can see the defect in angled light after claying, stop claying and assess polishing.
What Claying Does Well
Its real win is revealing the true surface. Once bonded film is gone, paint feels smoother by touch and you can tell whether a mark is remaining contamination or a defect in the clear coat. Glass and chrome can feel cleaner too when bonded film is lifted.
That clarity prevents the common mistake of chasing swirls with more clay. The panel may be perfectly smooth and still look marked, which means the defect is below the layer clay can reach.
Planning wax or coating soon? Decontaminate first so protection bonds to paint, not grit.
Clear Limits to Respect
Swirls, scratches, etched water spots and oxidation sit at or below the surface, which is why the table routes them to polishing rather than more passes with a bar. For that next decision, see our guide to paint correction and whether it’s worth it.
Know when to walk away as well: stop as soon as slickness returns, avoid soft, peeling or failing clear coat where the top layer may lift, and treat any mark still visible under angled light after claying as a polishing question.
Repeated aggressive claying on the same panel adds micro marring without any extra gain.
If the panel feels smooth but still looks marked, you’ve reached the end of what clay can do. The next step is polishing, not another round with a stronger bar.
Smooth but still swirled? Book Cut & Polish rather than claying the same panel again.
Should You Clay Bar at Home or Hire a Professional?
Start with the bag test result, not the price tag. If your paint came back smooth, neither route needs a clay bar at all. When roughness is confirmed, the right choice depends on contamination level, paint colour, your patience, and what you plan to do after claying.
| Factor | DIY clay bar | Professional detailer |
|---|---|---|
| Upfront cost | Clay bar, lubricant and microfibre for a full kit | Full Car Detailing starts from $349 |
| Time for a full car | A few hours on a first attempt | Shorter, with a trained crew |
| Skill and risk | Moderate, marring if clay is dirty or paint is dry | Lower risk with experienced technique |
| Tools needed | Clay, lubricant, microfibre, good lighting | Iron remover, lubricants, inspection lights, polishing pads |
| Best for | Regular light contamination on daily drivers | Heavy fallout, dark paint, pre-sale and pre-coating work |
| Outcome | Smooth paint, no defect correction | Deep clean inside and out, with a protective wax finish |
First attempt on dark paint? Practise on a small lower panel first, or let a professional handle the whole car.
For the DIY cost anchor, Car Care Products Australia listed a branded surface detailing clay bar at A$53.99 on sale in 2025, reduced from A$59.99. Total spend runs higher once you add lubricant, quality microfibre cloths and replacement clay for the piece you will eventually drop.
On the professional side, Full Car Detailing starts from $349 and covers a complete deep clean inside and outside, including paint cleansing, a protective wax finish and hand polish. If the car only needs a lighter refresh rather than full decontamination, Mini Car Detailing starts from $199. Our overview of hand car detailing in Perth and what to book helps you match the service level to the car's actual state.
Describe the car's condition when you request a quote: fallout level, paint colour and any planned coating all change time and price.
Which Route Suits Your Car
- Choose DIY for light, regular contamination: You can work in shade, check each panel by touch and protect the paint straight after.
- Choose a professional for heavy fallout: Chemical treatment, claying and polishing may all be needed in sequence.
- Choose a professional for dark paint: Fine marring shows quickly on dark colours and usually needs machine finishing.
- Choose a professional before sale or coating: Buyers and coatings both reward thorough preparation.
Be honest about the risk. A first attempt goes wrong in a predictable way: the lubricant flashes dry mid-panel or the clay face loads up with grit, and a faint haze appears under bright light on paint that looked clean an hour earlier.
Heavy fallout or a ceramic coating coming up? The coating service already includes paint surface preparation, and code PRIME100 takes $100 off Full Car Detailing and Ceramic Coating when you book online.
Is Your Paint Ready for Wax, Coating or Polish?
Your bag test results split the decision into three paths. Roughness points to decontamination, visible marks point to correction, and smooth clean paint is ready for protection such as the options in our guide to liquid car wax and when to use it.
The order matters because protection seals in whatever sits underneath. Wax or coating over bonded grit works like varnish over a dusty tabletop: it hardens around the contamination rather than the paint, and the finish looks patchy instead of deep.
A Simple Decision Checklist
- Rough after washing: Treat fallout or tar chemically, clay the remaining roughness, then protect promptly so the clean surface isn't left bare.
- Smooth but swirled or scratched: This is a correction decision. Those defects sit in the clear coat itself, so they belong to the machine-polishing route covered in the limits discussion above.
- Ceramic coating planned: Remove bonded contamination first, because grit trapped under a coating weakens bonding and shortens its working life.
- Smooth and unmarked: Skip claying and go straight to protection. Clay on clean paint only adds marring risk.
Run the bag test this week and note which panels feel rough. That note makes any booking conversation faster.
When the marks are in the paint rather than on it, our Cut & Polish starts from $249 and includes an exterior wash, clay bar or paint preparation, and machine cut and polish to restore paint and remove scratches.
Coating expectations deserve the same honesty. Ceramic coating resists light surface scratches and swirl marks, but it doesn't make a car fully scratch proof or chip proof, and it doesn't replace clear bra or paint protection film for stone chip resistance. The service does include paint surface preparation, a deep clean that strips the bonded contaminants your bag test just found.
Booking online? Full Car Detailing and Ceramic Coating are $100 off with the code PRIME100.
You can visit us at 9/436 Wanneroo Rd, Westminster, seven days a week. You don't need to pre-clean the car before a detail, so just remove personal items and valuables beforehand.
Rough paint after washing, visible fallout, or preparation needed before polish or ceramic protection all sit inside the services above. Book your visit through Prime Shine Hand Car Wash and let the Westminster team take it from there.