







You’ve washed the car, dried it in the shade, and the paint still looks covered in cobwebs when the Perth sun hits it. A black bonnet can look glossy from a distance, then reveal swirl marks, haze and random scratches under a focused inspection light. That’s the point at which more shampoo won’t solve the problem. You need to decide whether the damage is sitting in the clear coat, whether it can be safely reduced, and how much correction the vehicle deserves.
Paint correction isn’t a competition to remove every mark. It’s controlled surface refinement, with clear-coat preservation taking priority over a perfect-looking test panel. The safest process is always wash, decontaminate, inspect, correct with the least aggressive combination that works, then protect.
What Does Paint Correction Actually Fix?
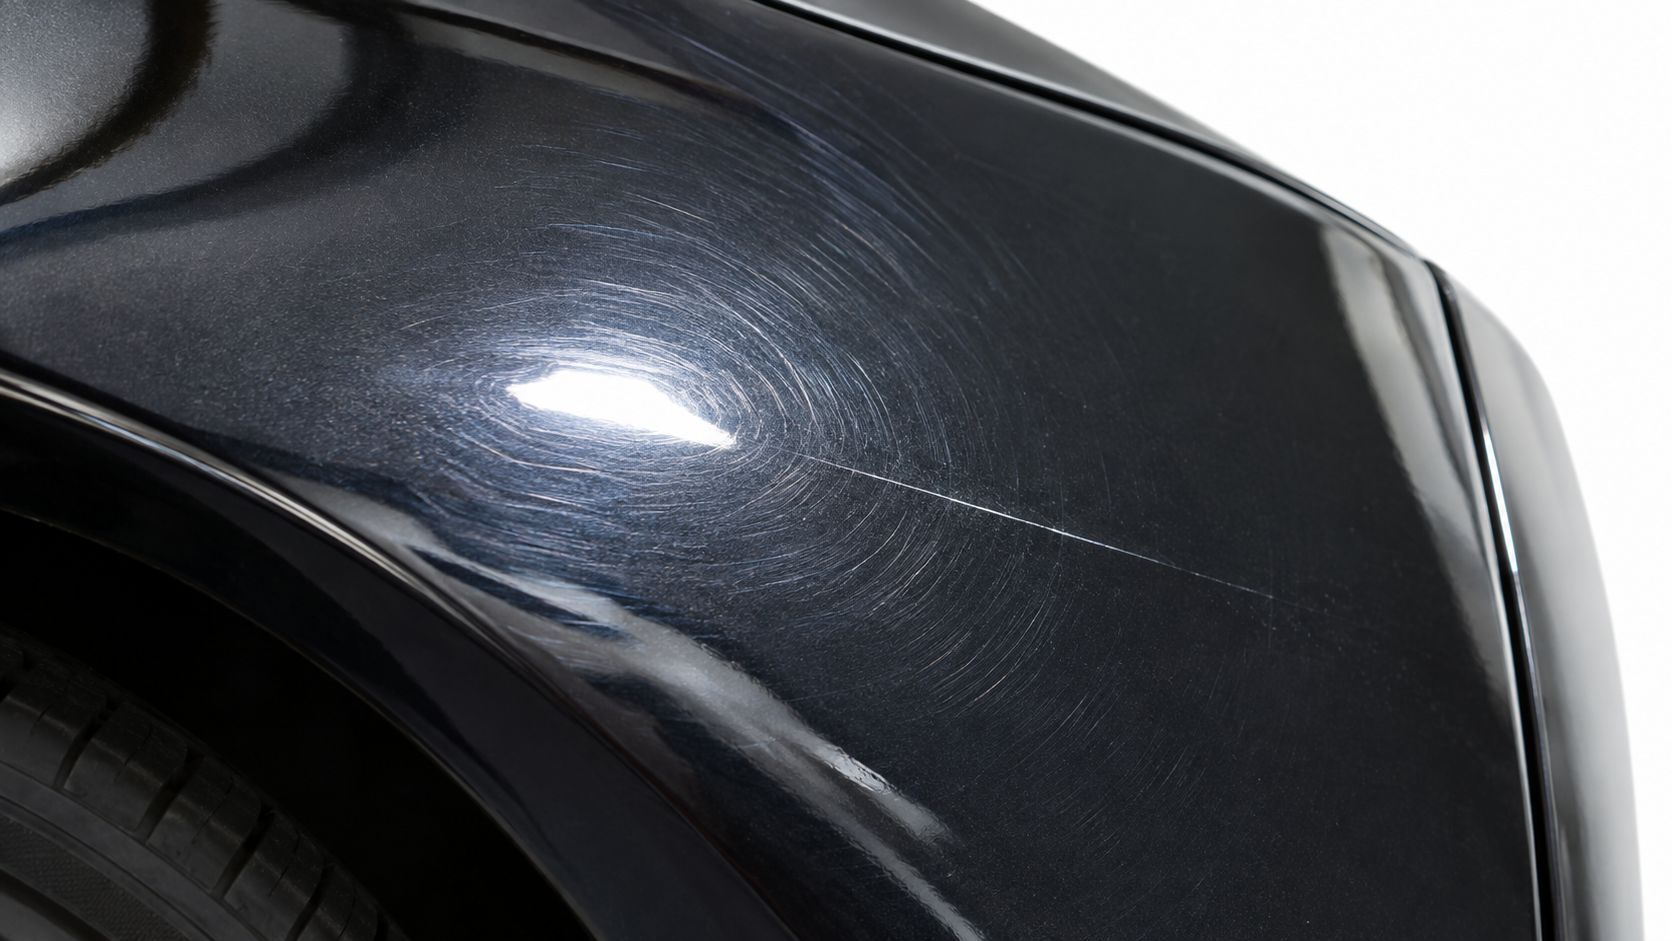
A typical example is a daily driver with circular marks around the bonnet and boot lid. The owner sees scratches and assumes the car needs repainting, but under inspection lighting most of the defects appear as fine lines floating in the upper paint surface. Those are usually wash-induced swirls or haze in the clear coat, and careful polishing can level the surrounding surface so the marks become far less visible.
Paint correction removes or reduces clear-coat defects, including swirl marks, light scratches, oxidation, water spots and surface haze. Australian guidance describes swirl marks as defects in the clear uppermost paint coat, where careful polishing can remove a microscopic layer and reduce the uneven surface that scatters light. The recommended starting point is the least aggressive polish, with compounding reserved for more severe damage, as explained in RACV’s guidance on reducing swirl marks.
Where polishing has a hard limit
Run a clean fingernail lightly across a scratch after washing the panel. If the mark catches sharply, looks white or exposes a different layer, it may extend beyond the clear coat. A polish can soften its edges and improve the surrounding gloss, but chasing it until it disappears may remove more clear coat than the result justifies.
That distinction matters on cars exposed to strong Australian UV, especially vehicles that live outside or have already been polished aggressively. A deep scratch, peeling clear coat, rust, paint chip or failed repaint isn’t a normal polishing defect. Those problems need repair planning rather than increasingly abrasive machine work.
Australian vocational training formally recognises paint correction-related work through AURVTP008, which covers cleaning and polishing vehicle paint surfaces within the Automotive Retail, Service and Repair training package. A related unit, AURVNP4001, focuses on evaluating vehicle paintwork for damage and identifying the required refinish, reinforcing the practical rule that diagnosis comes before polishing. The nationally endorsed training details are available through AURVTP008’s official training record.
Choosing a realistic result
A one-step enhancement may be the sensible choice for a family car with mild swirls and faded gloss. A two-step process can make sense when moderate defects remain after a test spot, while targeted spot correction may be more appropriate for isolated handle marks or one damaged panel. More stages aren’t automatically better. They increase polishing time and can increase risk if the paint doesn’t need them.
Before booking or buying equipment, compare the visible defects with the vehicle’s use. A lease return, older commuter or work vehicle may benefit more from improved gloss and reduced wash marring than from a risky attempt at near-perfection. For an overview of realistic correction stages and outcomes, see this guide to paint correction stages and costs.
Book Paint Correction Assessment
How Do You Inspect and Prepare Paint Safely?
Preparation determines whether correction improves the finish or grinds contamination into it. A panel can feel clean after a quick wash while still holding bonded iron particles, road film, sap or mineral residue. Machine polishing over those particles creates fresh marring and can clog the pad, so the job starts with cleaning rather than cutting.
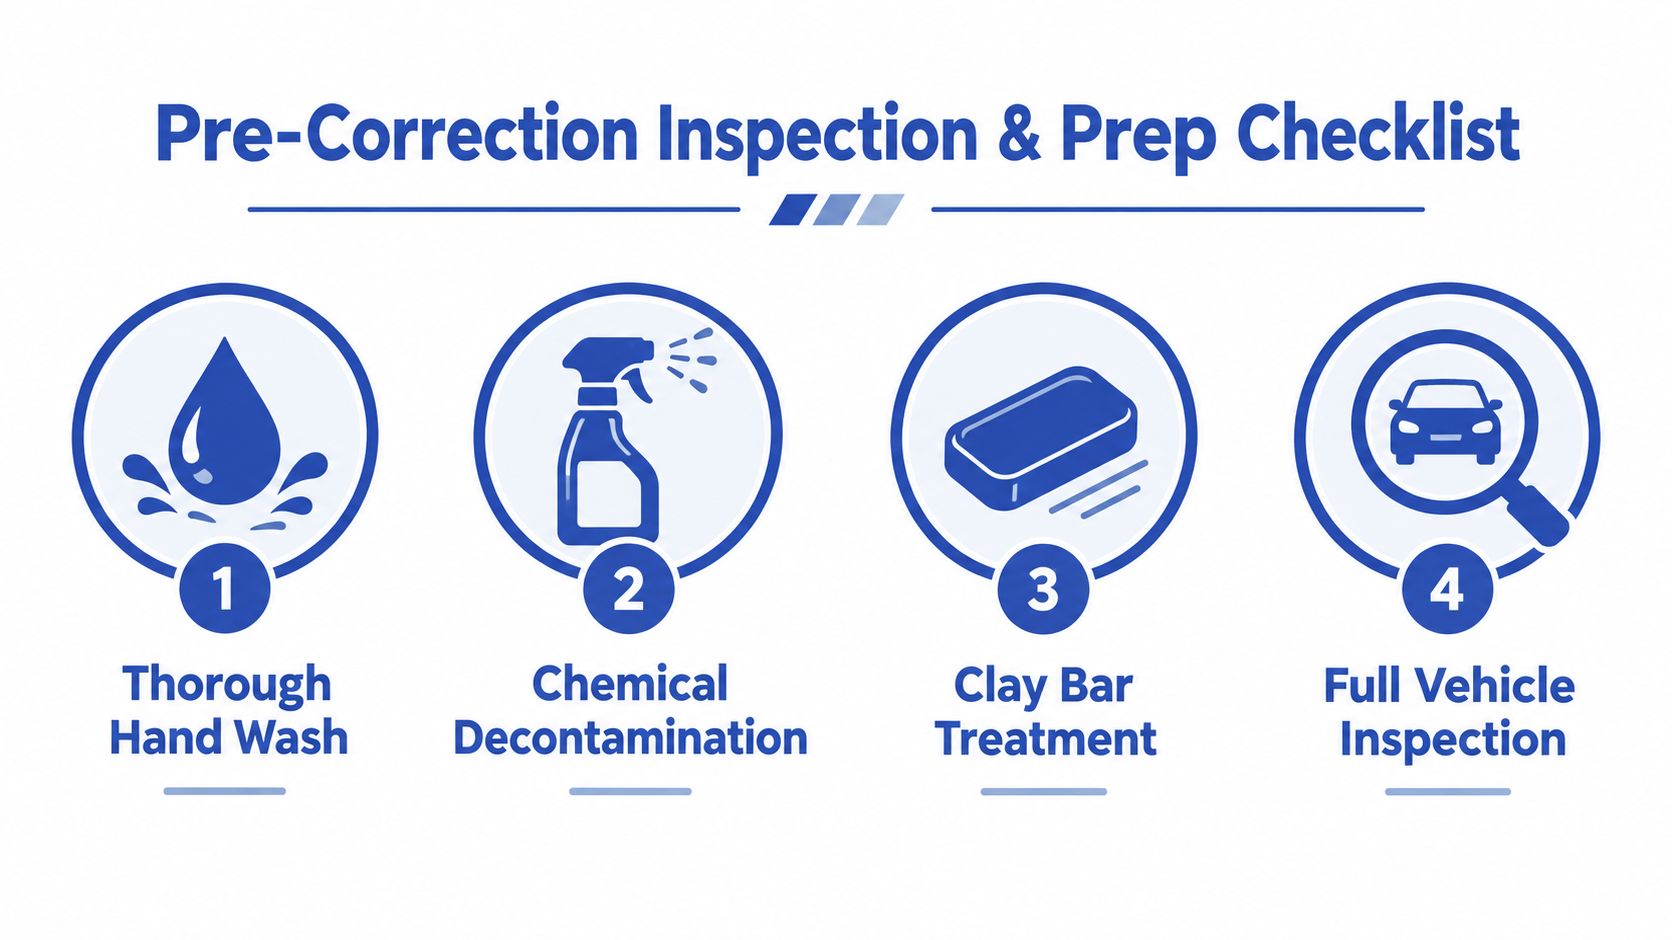
Follow a diagnostic preparation sequence
-
Wash thoroughly by hand. Clean the wheels and tyres first, then wash the body from the top down with a dedicated wash solution and clean microfiber media. Rinse often, and don’t wipe a visibly gritty panel with a dry towel.
-
Treat chemical contamination. Use an appropriate chemical decontamination product where bonded road film or metallic contamination remains. Follow the product directions, keep the surface wet as required, and rinse completely.
-
Clay only where needed. After chemical treatment, inspect the paint by touch. If it still feels rough, use a lubricated clay bar or clay mitt with light pressure. Repeatedly claying smooth paint adds friction without adding value.
-
Dry and inspect. Use clean drying towels and blow water from mirrors, badges, trims and panel gaps. Water emerging during polishing can dilute compound, sling product and interfere with your inspection.
A clean panel isn’t necessarily a safe panel. Use strong, angled lighting rather than relying on broad garage illumination, because overhead light can hide haze and buffer trails. Inspect in direct sunlight when practical, then confirm under a focused light that reveals both fine swirls and uneven gloss.
Map the paint before touching the machine
Work panel by panel and mark the different defect types mentally or with removable tape. Uniform circular marks usually point to washing, while straight random scratches may come from branches, bags, belts or abrasive contact. Water spotting can appear as rings or etched patches, and oxidation often presents as a general loss of clarity rather than one isolated scratch.
Check edges, body lines, repaired panels and areas around badges. Previous repaint work can have different hardness and thickness from the surrounding factory finish, so a combination that behaves safely on the bonnet may haze or cut much faster on a repaired door. If you don’t have paint thickness information, treat unknown areas conservatively.
Practical rule: A test spot isn’t a formality. It tells you whether the defect responds to polishing and whether the paint can finish cleanly with the selected pad and product.
Tape delicate trim, rubber seals, sharp edges and vulnerable badges before machine work. Then choose a small representative test area, preferably one that includes the dominant defect. If a light polish removes enough damage while preserving clarity, stop there. If it doesn’t, increase aggressiveness gradually, not instinctively.
For a more detailed cleaning stage before correction, use this car paint cleaning treatment guide. The objective is simple: remove contamination, expose the defect and establish a safe starting combination before the full vehicle is involved.
See Paint Cleaning and Prep Options
Which Tools and Products Should You Match to Your Paint?
The machine, pad and product should reflect the defect, paint behaviour and acceptable risk. A dual-action polisher is generally the more forgiving choice for home users because its movement reduces the chance of concentrating heat and abrasion in one place. A rotary polisher can cut quickly and give an experienced operator precise control, but it also demands better awareness of edges, heat and finishing quality.
Pad choice changes the result as much as the liquid product. A heavy cutting pad paired with a cutting compound can reduce deeper swirls and oxidation, but it may leave haze. A polishing pad with a medium or fine polish removes less material and often gives a better balance for daily drivers. A soft finishing pad with a finishing polish is used to improve clarity and remove light micro-marring after a stronger pass.
Match the combination to the defect
| Defect Level | Pad and Product Combo | Expected Outcome |
|---|---|---|
| Light swirls and mild dullness | Soft polishing or finishing pad with a fine polish | Improved gloss and reduced fine marring with minimal correction |
| Moderate wash damage | Medium polishing pad with a suitable medium polish | Noticeable defect reduction while retaining a refined finish |
| Deeper clear-coat swirls and oxidation | Cutting pad with a cutting compound, followed by a refining polish | Stronger correction, then removal of cutting haze |
| Final haze or machine marring | Soft finishing pad with a finishing polish | Clearer reflections and a cleaner, more uniform finish |
| Isolated scratch or etching | Small pad and carefully controlled spot correction | Local improvement without unnecessarily correcting the entire panel |
These are starting points, not package promises. Hard paint may need more work to level defects, while soft paint may respond quickly but haze just as quickly. Previous repaint work makes the test spot even more important.
Why the three-stage logic can be useful
An Australian detailing workflow describes up to three polish-and-pad combinations: a heavy cutting compound and pad for deeper swirls or oxidation, a finer cutting polish and polishing pad to remove haze, then a finishing polish and pad for a swirl-, mar- and hologram-free finish. That sequence is outlined in this paint correction process guide.
A strong kit doesn’t need every abrasive available. For most enthusiasts, a dual-action machine, one medium polish, one finishing polish, suitable pads, clean microfiber towels, pad-cleaning equipment and a reliable inspection light provide a more controlled foundation than a large collection of aggressive compounds.
Use an isopropyl panel wipe after polishing to remove residual oils and reveal the actual finish before applying protection. This prevents a product from hiding haze that later becomes visible after the first wash. If you’re choosing products or arranging a service, this guide to choosing the right car polish service explains why the observed paint condition matters more than a stage label.
Choose the Right Polish Service
How Do You Machine Polish Without Burning Clear Coat?
Safe machine polishing is controlled movement, moderate pressure and frequent inspection. The machine should work the product across the paint, not sit in one place while the operator tries to force a defect away. Clear-coat preservation depends on recognising when improvement has levelled off.
Build the test spot first
Prime the pad with a small amount of product, then add only enough fresh polish for the working area. Too much product makes the pad slide, reduces cutting consistency and increases wipe-off difficulty. Keep the pad flat wherever the panel allows it, and use a smaller pad or slower, more deliberate movement around curves.
Set a manageable working speed on the machine and begin with light to moderate downward pressure. Move the machine slowly enough to make overlapping passes, but never park it on an edge or body line. A practical correction pattern is a crosshatch, first moving horizontally across the area, then vertically with overlapping passes.
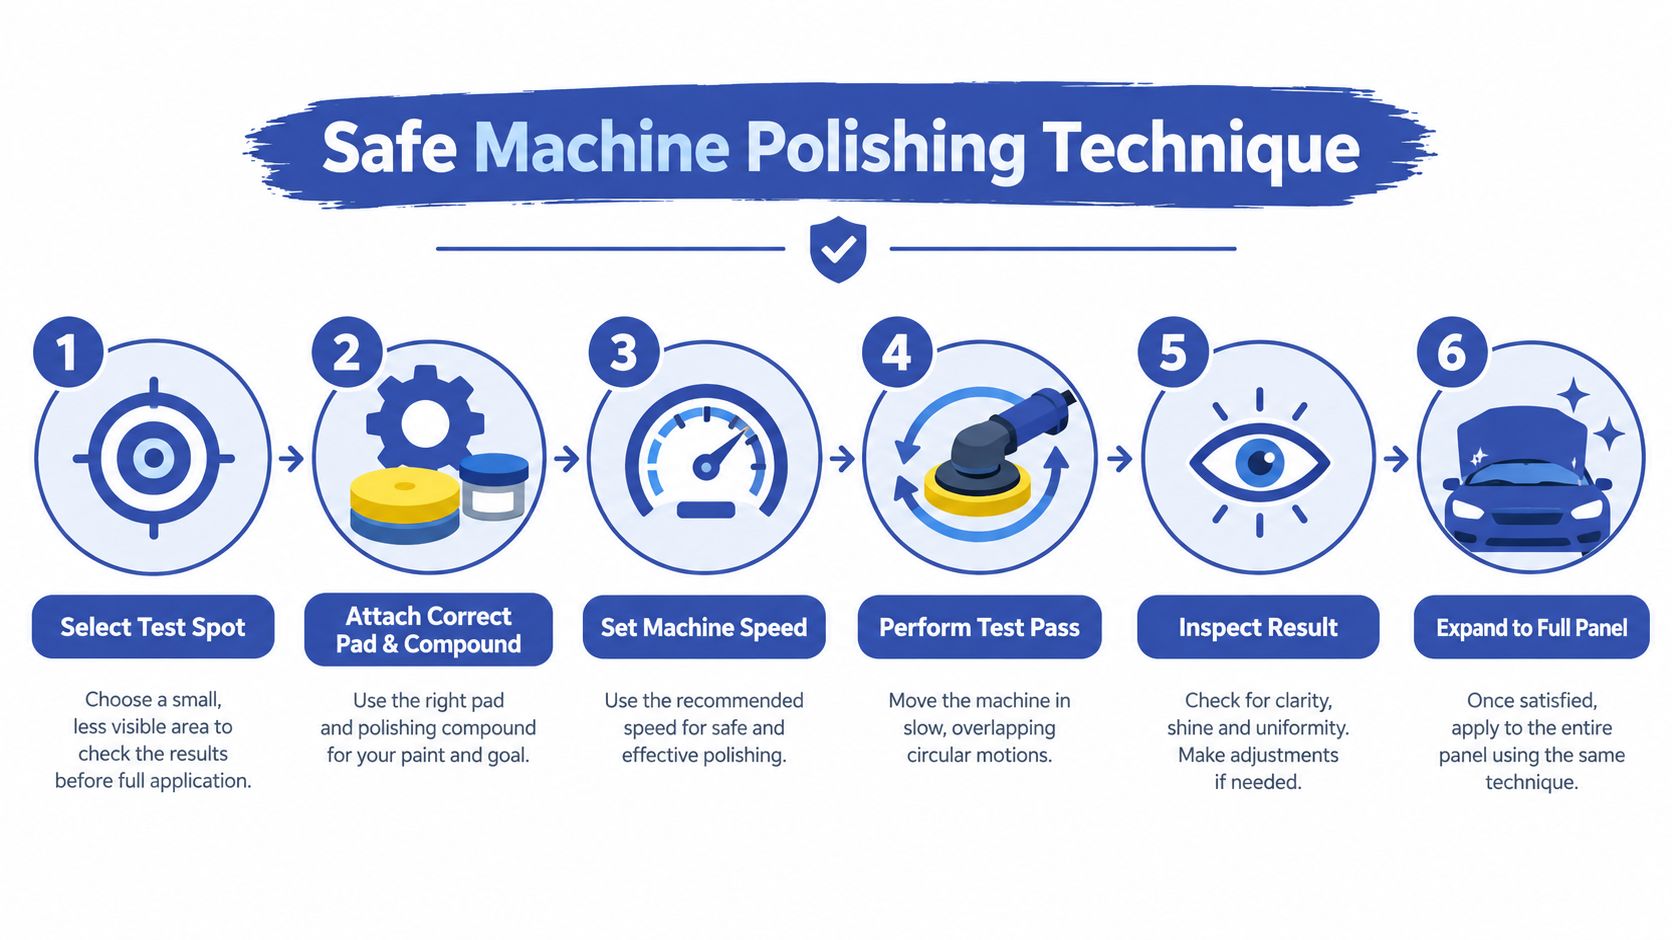
Don’t guess the correct speed or pressure from a package name. Start gently, observe how the pad rotates, watch the product film and stop before the compound dries hard. If the pad begins skipping, reduce pressure, clean the pad and check that the panel isn’t too hot or contaminated.
Work in small areas and inspect every pass
Correct one manageable section at a time. Wipe the residue with a clean microfiber towel, change towels when the working face becomes loaded, and inspect under the same lighting used to assess the defects. If the panel looks improved but slightly cloudy, refine it with a softer pad and finer polish rather than immediately adding more cutting power.
A clean pad matters because spent polish and removed paint build up on its face. Brush or blow out the pad between sections, and swap to a fresh pad when the face becomes saturated. A loaded pad can reduce correction, increase heat and leave uneven gloss.
The safest correction is the one that stops when the useful improvement stops.
Keep the machine moving at a steady pace across flat surfaces. Reduce pressure near edges, raised styling lines and repainted sections, and tape sharp transitions where practical. Edges carry less paint to work with and can heat or burn faster than the middle of a broad panel.
Know when the defect has crossed the safety line
If a scratch remains after a sensible test spot, inspect its depth rather than automatically reaching for a heavier compound. A mark that breaks through the clear coat won’t become safe just because you spend longer polishing it. Improve the surrounding clarity, soften the appearance if appropriate, and leave the deeper damage for touch-up or refinishing assessment.
Holograms, buffer trails and uneven gloss usually indicate that the cutting stage hasn’t been refined properly, the pad was tilted, the product was worked incorrectly or the paint responded poorly to the combination. A final inspection wipe separates actual correction from oils that temporarily fill defects. Repeat the refining step only where the finish needs it, not across the entire car by habit.
Book a Safe Cut and Polish Service
How Do You Finish and Protect the Correction?
The final wipe is where you find out what you achieved. Polishing oils can make a panel look richer and smoother, but they can also conceal faint haze or remaining micro-marring. Use an appropriate isopropyl wipe, work cleanly and inspect from several angles before deciding whether the finish needs another refining pass.
Protection should match how the car lives. A spray wax is quick to apply and suits owners who wash regularly, while a hand wax or sealant adds a more deliberate protective layer. A ceramic coating demands more precise preparation and application, but it can improve durability, water behaviour and maintenance effort when installed on properly corrected paint.
Put protection on a clean surface
Australian detailing providers commonly recommend correction before ceramic or graphene coatings because the coating bonds to the prepared surface rather than locking in swirls and water marks. The same principle applies to wax. Protection doesn’t repair defects underneath it, although some products can temporarily disguise them.
Follow the protection product’s application and curing requirements. Keep the car away from contamination during the initial set period, avoid unnecessary touching and don’t rush into a harsh wash. Heat and intense Perth sunlight also make shade, cool panels and controlled application important during the finishing stage.
Stop new swirls from returning
Correction lasts only as well as the next washing routine. Use clean wash media, separate wheel equipment from paint equipment, rinse grit away and dry with clean towels rather than wiping a dusty car. Avoid automatic brushes and improvised wipe-downs on dirty panels, because they recreate the same marks you just removed.
For Perth drivers deciding between traditional protection and a coating, this paint protection versus ceramic coating guide offers a use-case framework. The right choice isn’t the most advanced option. It’s the one you’ll maintain properly.
Compare Paint Protection Options
When Should You DIY and When Should You Call Prime Shine Hand Car Wash?
A neglected dark car may need a cutting step and refinement, while an older vehicle with thin, previously polished or repainted areas may be safer with a one-stage enhancement. More stages do not automatically mean a better result. Stop when the gloss improves clearly without removing clear coat for defects that are barely visible in normal use.
Australian service guidance commonly positions light enhancement as work that can take about a day, while multi-stage correction may take 2 to 7 days depending on vehicle condition. That time includes inspection, preparation, correction, refinement and protection, not machine polishing alone.
Troubleshoot the finish before adding aggression
- Lingering haze: Switch to a softer pad and finer polish, reduce pressure, then inspect after a clean wipe.
- Holograms or buffer trails: Refine the affected area with controlled overlapping passes instead of repeating the cutting stage.
- Pad skipping: Check for excess product, a dry surface, excessive pressure, panel heat or a loaded pad.
- Uneven gloss: Clean the pad, reduce the working area and check for previous repaint work.
- Deep scratch remains: Stop chasing it if it catches a fingernail or appears to pass through the clear coat.
A professional assessment makes sense when the paint history is unknown, the clear coat has failed, a scratch is clearly deep, or you cannot judge whether further polishing is safe. It is also sensible when consistent results matter more than practising, especially on a dark enthusiast car or across several fleet vehicles.
Choose the outcome that fits the car
An older, high-mileage daily driver, resale preparation or lease-end return may suit a one-stage polish better than an attempt at complete defect removal. Preserving remaining clear coat is often the better trade-off, particularly under Australian UV exposure and repeated wash damage. A substantial Australian repair ecosystem exists, according to IBISWorld’s Australian industry data, but that does not mean every vehicle needs the most intensive correction available.
Prime Shine Hand Car Wash in Westminster offers hand-wash methods, Cut & Polish and Ceramic Coating for drivers who want preparation, correction and protection handled together. If you are unsure whether the paint needs enhancement or deeper correction, book an inspection before approving the most aggressive package.
Visit Prime Shine Hand Car Wash in Westminster for a condition-led Cut & Polish or Ceramic Coating service, with hand-wash methods designed to reduce fresh wash damage. Book online when ready, and ask the team to match the correction level to the paint condition, vehicle use and clear-coat limits.