








A ceramic-coated car should be pre-rinsed, washed with ceramic-safe soap and clean microfiber tools, then dried promptly without abrasive pressure. If you want the coating to keep its bead and gloss, the key question isn’t whether to wash it, it’s whether your wash method protects the layer or grinds contamination back into it.
What should a ceramic-coated car look like after washing? Strong water beading and a clean, glossy finish usually mean the coating is still doing its job, but that finish can hide contamination, water spots, or over-aggressive washing. The seven examples below show the difference between safe maintenance, contamination removal, and needless aggression, so you can see what healthy aftercare looks like in practice.
Prime Shine Hand Car Wash in Westminster is a local option for hand washing, detailing, and paint protection, which matters because ceramic-coated cars respond best to careful human technique rather than automatic friction. That same mindset also helps when you’re deciding when to stay at home and when a professional hand care service makes more sense.
1. The Two-Bucket Method with Grit Guards
The two-bucket method is the cleanest starting point for ceramic-coated paint because it separates the dirt from the clean wash solution. One bucket holds your ceramic-safe shampoo, the other is just for rinsing the mitt, with a grit guard at the bottom to trap sediment before it gets dragged back onto the panel.
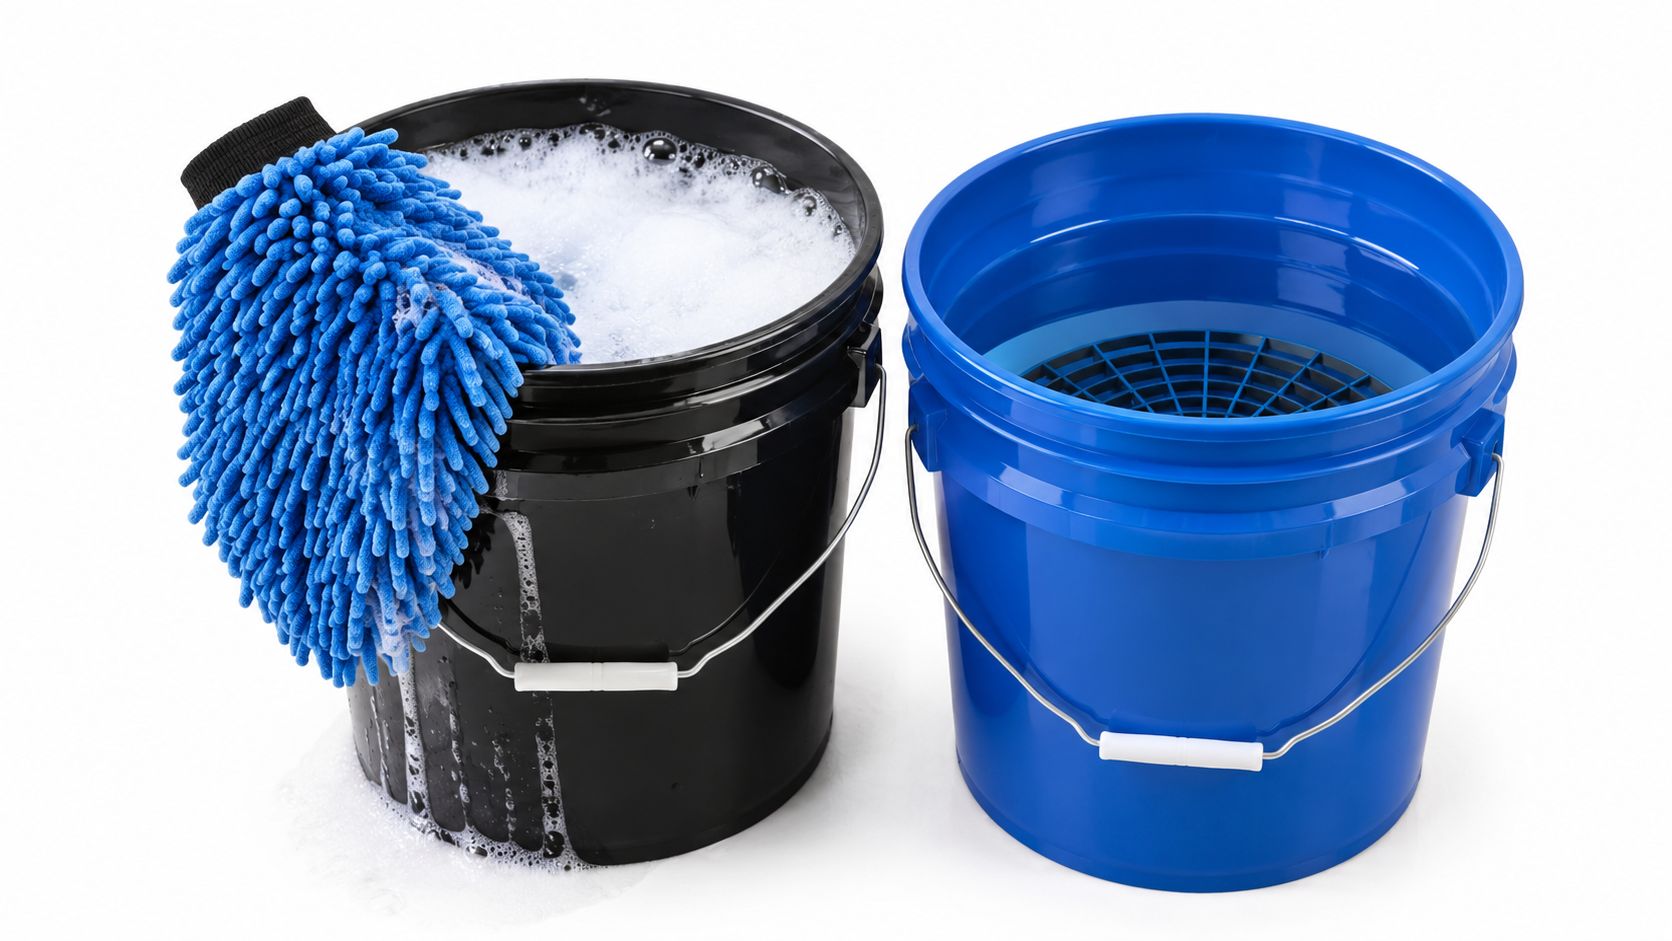
The visual test is simple. If your wash mitt goes from the paint to the soap bucket without a rinse, you’re moving grit around, not cleaning. That’s how light contamination turns into micro-scratches, especially on lower panels where road film settles hardest.
Practical rule: keep the rinse bucket separate at all times, and rinse the mitt after every panel or every small section.
Use at least two 5-gallon buckets, because more water volume slows down contamination build-up and reduces the number of changes you need to make. Start at the roof and work downward, because you don’t want to drag grime from the sill and lower doors back over the cleaner upper surfaces. A microfiber wash mitt is the right tool here, since it lifts residue into the fibres instead of scraping it along the finish.
If you want a local hand-wash process built around this logic, see Prime Shine’s hand car wash guide for how careful washing fits into a broader maintenance routine.
2. pH-Balanced and Ceramic-Safe Soap Selection
Soap choice matters because the coating should stay slick and water-repellent, not be stripped back by harsh cleaners. Use a pH-neutral shampoo for coated paint, because it cleans the dirt on top without attacking the protection underneath.
The wrong wash product usually shows up in the finish first. Beading looks uneven, the gloss feels flat, and rinse water starts clinging instead of clearing cleanly. A coated car should not be washed with generic detergent meant for unprotected daily use.
Choose a soap that says ceramic coating safe or pH-balanced on the label, then dilute it properly. Match the product to the coating rather than forcing a one-size-fits-all wash onto the paint. Keep one soap on hand consistently, because changing products every wash makes it harder to judge what is working.
Perth cars pick up a specific mix of dust, salt film, and mineral residue, so the safest shampoo is the one that cleans without leaving extra residue behind. If you are unsure which product suits your coating, check the label before each wash rather than guessing at the panel.
Before and after read: the right soap leaves the panels feeling slick after rinse, while the wrong one often leaves the surface dull and grabby.
3. Pre-Wash with Foam Cannon and Pressure Rinse
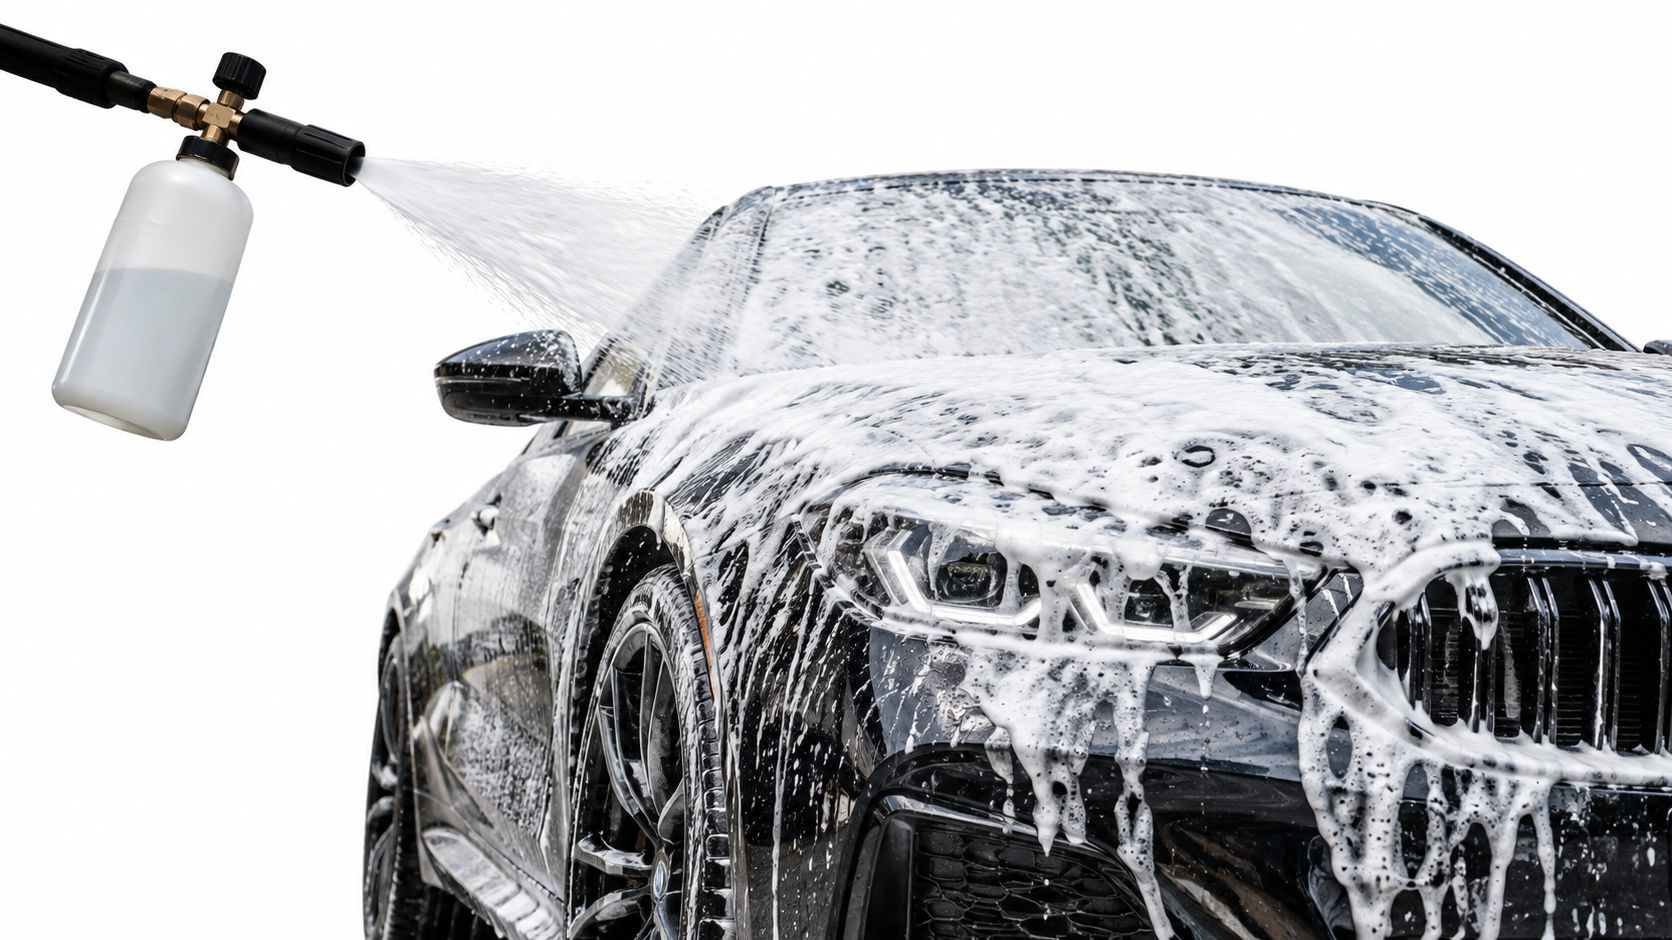
A foam pre-wash is what you use when the car has more than light dust on it. The foam clings to the panel, loosens road film, and gives the pressure rinse a chance to remove loose grime before your mitt touches the paint.
That matters more in dusty environments and coastal areas, where contamination can sit on the coating instead of falling away neatly. Around Perth, the practical challenge is less about whether the coating beads and more about what’s sitting inside that bead pattern, salt film, mineral residue, or fine dust that still needs to come off.
Use the foam top to bottom, let it dwell briefly, then rinse evenly. Avoid blasting trim, rubber seals, and emblems with heavy pressure, because the goal is to lift contamination, not force water into the wrong places. A good pre-wash should make the hand wash easier, not replace it.
Foam is a contamination release step, not a substitute for hand washing.
If the car has heavy grime, the foam stage gives you a much cleaner starting point than going straight in with a mitt. That’s especially useful after motorway driving, coastal parking, or a week of dust build-up in a garage that isn’t fully sealed.
4. Microfiber Wash Mitt Technique and Straight-Line Pressure Application
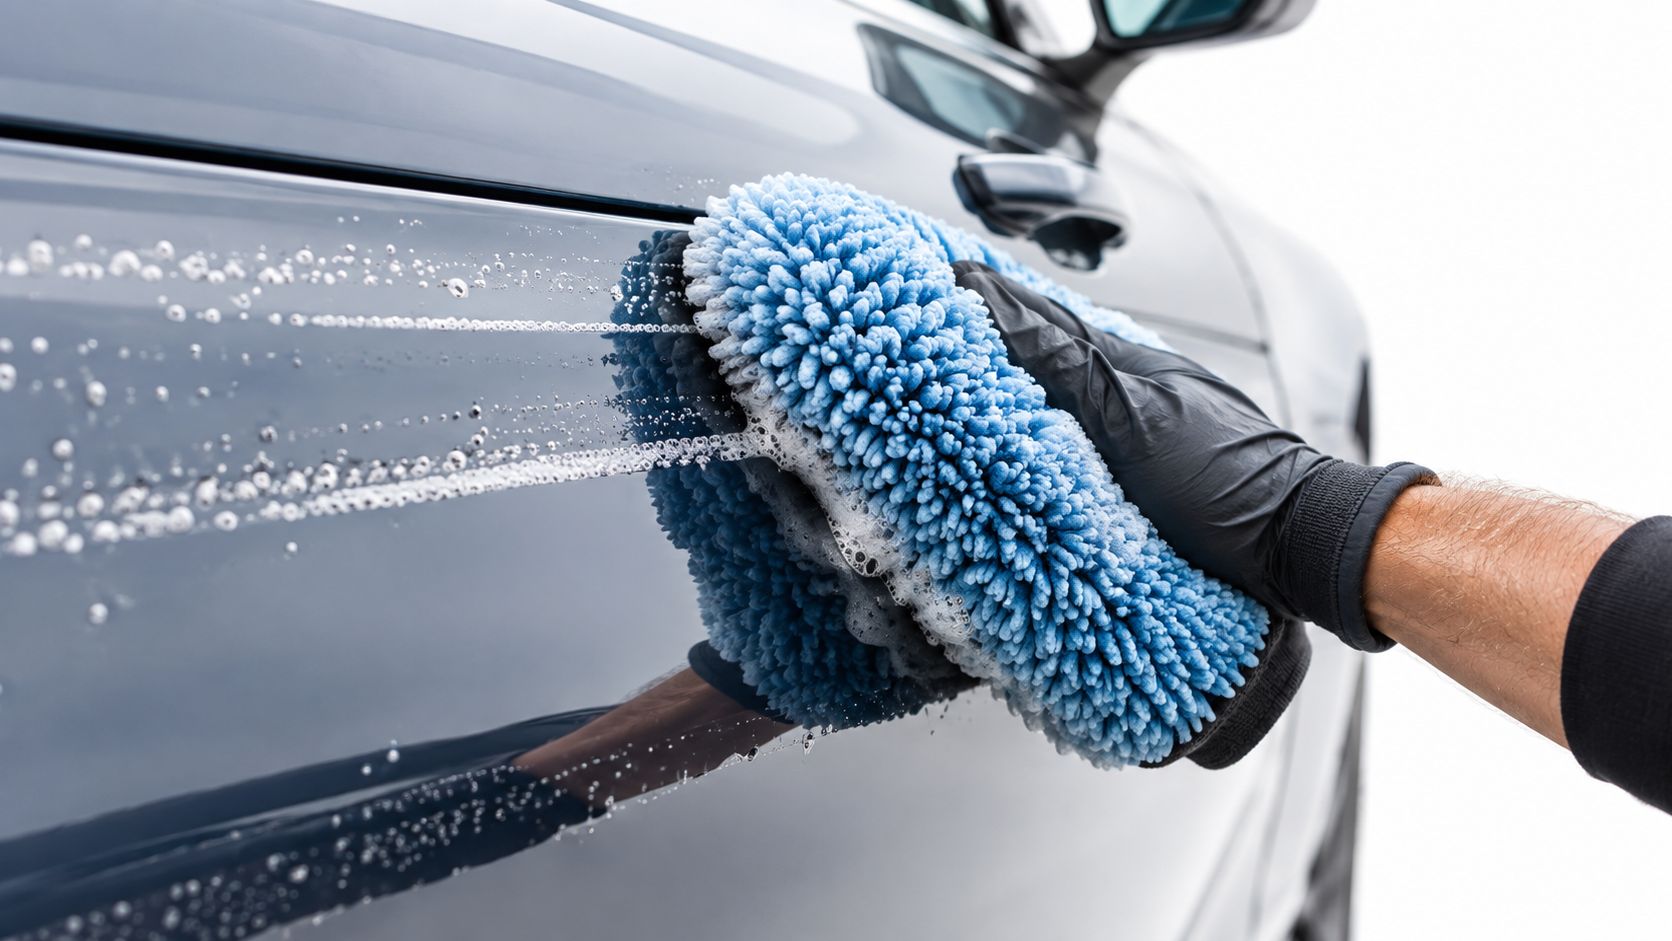
A microfiber wash mitt does the visible work, but the actual control comes from your hand. Straight-line passes, or short overlapping rows, keep loosened grit moving off the panel instead of being dragged in circles.
The result shows up in the light. A clean wash leaves an even gloss and no fresh swirl pattern under angled sun. Hazy paint usually points to too much pressure, loose movements, or a mitt that has picked up contamination and stayed in use too long.
- Use light, even pressure: let the fibres lift the grime, do not press it into the paint.
- Work in straight lines: controlled passes suit ceramic-coated panels better than circular scrubbing.
- Keep a separate wheel mitt: brake dust should never touch the paint mitt.
- Wash one section at a time: smaller areas make it easier to keep control and spot problem patches.
Perth dust and coastal residue make this stage more sensitive. A coated car can still hold fine grit in the film on the surface, so the mitt should glide with enough contact to collect dirt, not force it across the panel. Clean upper panels first, then work down to the dirtiest lower sections.
Many DIY washes go wrong here. When the paint still looks dirty, people push harder, but the coating usually needs better technique, not more force. That trade-off matters. Light contact takes longer if the panel is heavily soiled, while heavy pressure can mark the finish and make the next wash harder.
Practical rule: clean surfaces first, lower and dirtier sections last.
This is the stage where a professional hand detail differs most from a driveway wash. Prime Shine’s ceramic-coat hand detailing guide shows how straight-line pressure is used on coated paint in practice.
5. Spot-Free Drying with Chamois or Microfiber Drying Towels
Drying is where a lot of good washing gets undone. If mineral-rich water sits on the car and dries on its own, you can end up with water spots that ruin the clean finish even if the wash itself was careful.
Use a clean chamois or a high-quality microfiber drying towel and move it gently across the panel. Don’t scrub. Don’t grind. The point is to lift the water before it evaporates, not to polish the paint while it’s wet.
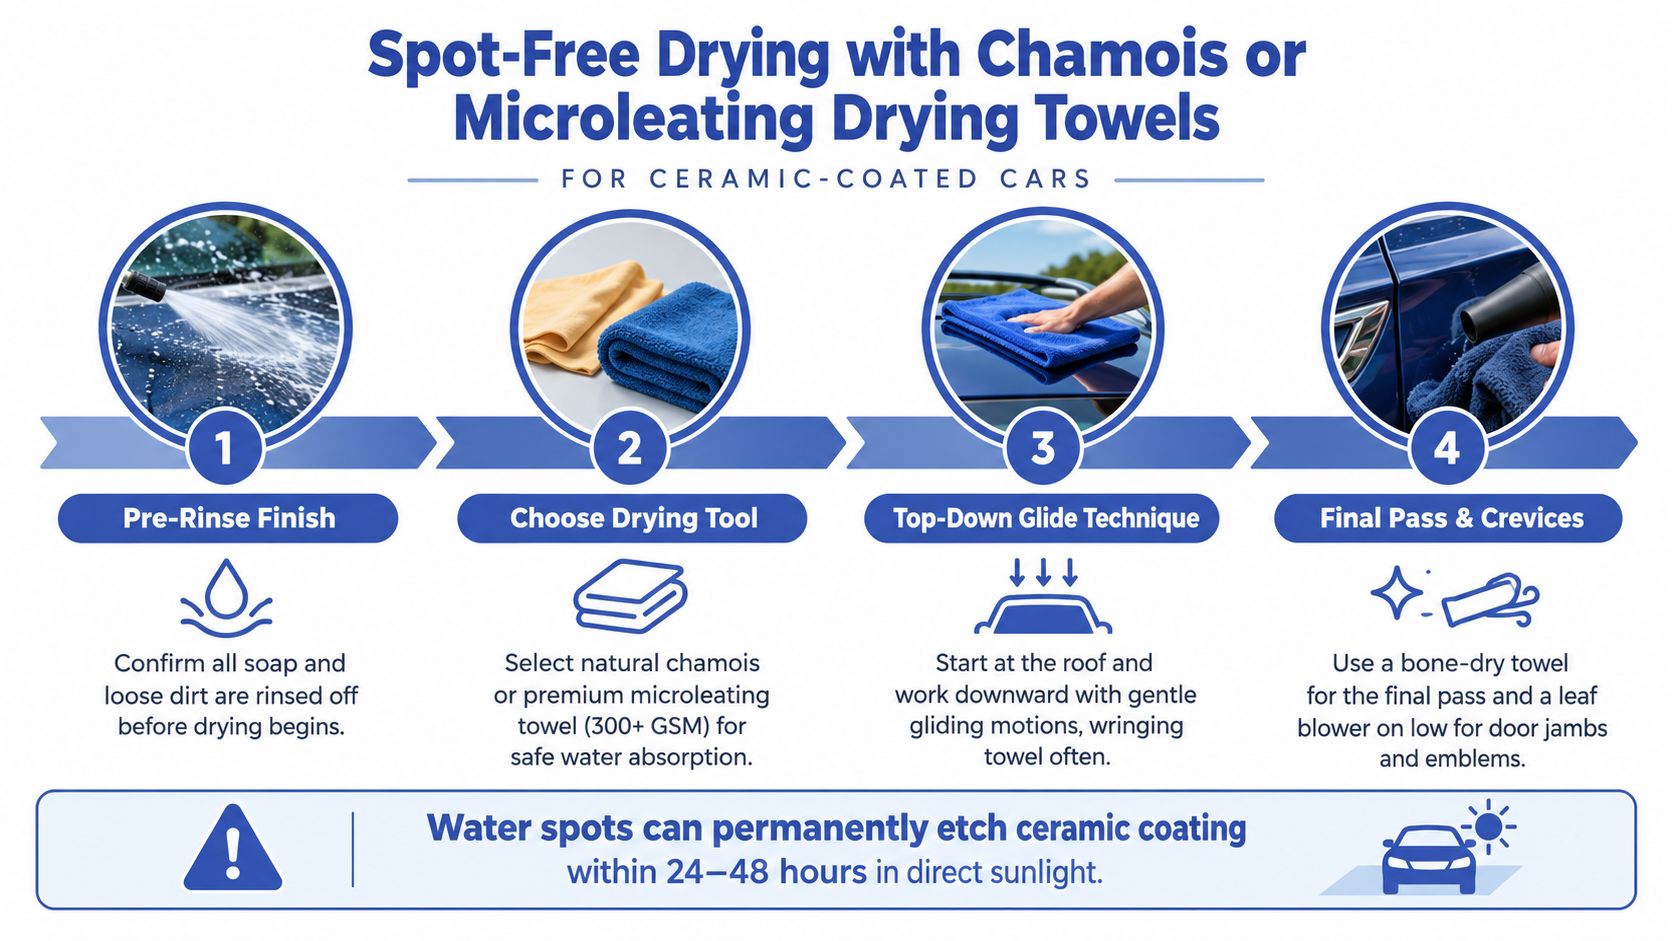
The visual difference is easy to spot. A properly dried car looks crisp, reflective, and free of halo marks around the mirrors, bonnet edge, or window seals. A poorly dried car often looks clean at first, then shows drying rings once the light catches it.
Work from the roof down, wring the towel as it loads up, and finish with a second dry towel if needed. In tight areas, a low-setting blower helps push water out of crevices and door jambs without adding friction. That’s especially useful on dark paint, where spotting shows up fast.
The main trade-off is speed versus safety. Air-drying is quicker in the moment, but it leaves residue behind. Prompt manual drying takes a little more effort, and that effort protects the coating’s finish.
6. Regular Maintenance Washing Schedule and Contamination Assessment
How often should a ceramic-coated car be washed? In practice, coated paint in Perth holds up best on a regular hand-wash cycle, tighter near the coast, because salt, dust, and mineral-rich water leave residue faster than inland driving does.
The calendar matters less than the surface. A garage-kept weekend car can usually go longer between washes than a daily driver that sits in road dust or coastal air. If the paint still feels slick and the beading stays tight, the coating is doing its job. If the surface starts to feel rough or the water spreads instead of running off, contamination is building and the wash needs more attention.
Check the car before you wash it. Light contamination usually needs a routine ceramic-safe hand wash. A gritty surface, dull gloss, or weak water behaviour points to a stronger pre-wash, and sometimes a professional hand care visit is the better call than pushing harder with the mitt.
- Keep a fixed rhythm: weekly, fortnightly, or adjusted to the car’s exposure.
- Read the beading: weaker beading often means residue sitting on the coating.
- Use professional refreshes where needed: inspections and maintenance top-ups suit cars that keep picking up contamination.
- Adjust for Perth conditions: salt, dust, and hard water all shorten the gap between washes.
For a local maintenance reference, Prime Shine’s Perth ceramic-coat care guide gives a practical fit for this schedule-based approach.
7. Clay Bar Treatment for Contamination Removal Before Main Wash
Clay bar treatment is for the cars that no normal wash can fully reset. It removes bonded contamination like industrial fallout, rail dust, brake dust particles, and tree sap residue that soap and water can’t dissolve on their own.
The surface tells the story before you touch it. If the paint still feels rough after washing, or if the gloss looks dull even though the car is clean, contamination is probably sitting in the coating’s top layer. That’s when claying becomes a correction step, not a routine wash step.
Use lubricant, work in small sections, and let the clay glide rather than press. A clay bar should remove contamination gently, not force the issue. If the panel is dry, stop and reset with lubricant, because dry claying defeats the point of a safe decontamination pass.
Practical rule: if the contamination feels embedded after a normal wash, don’t keep scrubbing, decontaminate first.
After claying, rinse thoroughly and go back to a ceramic-safe hand wash before drying. That sequence matters because claying clears the surface, but the wash resets the paint for proper finish and inspection. In a workshop setting, this is often where professional hand care becomes the better choice, especially on heavily contaminated cars, fresh paint correction work, or vehicles exposed to coastal and industrial fallout.
For a Westminster-based explanation of this kind of preparation, Prime Shine’s clay bar detailing guide gives the right context for when specialist treatment is the safer move.
Learn When to Use Clay Bar Care
7-Method Comparison: Washing Ceramic-Coated Cars
| Method | Implementation complexity | Resource requirements | Expected outcomes | Ideal use cases | Key advantages |
|---|---|---|---|---|---|
| The Two-Bucket Method with Grit Guards | Low, simple manual technique | Two buckets (5+ gal), grit guards, microfiber mitt, pH-safe soap | Fewer micro-scratches/swirl marks; preserved coating finish | Regular homeowner or detailer maintenance on lightly to moderately dirty cars | Low cost, effective contamination separation, easy to learn |
| pH-Balanced and Ceramic-Safe Soap Selection | Low, selection and correct dilution | Specialized pH-balanced/ceramic-safe soap (may require purchase) | Maintains hydrophobic properties, gloss, and coating longevity | Routine weekly/bi-weekly washes and coating-safe maintenance | Protects coating chemistry; safe for frequent use; preserves water-beading |
| Pre-Wash with Foam Cannon and Pressure Rinse | Medium, equipment setup and technique | Foam cannon, pressure washer, ceramic-safe foam, water/power | Removes heavy contamination contactlessly; reduces friction during hand wash | Heavily soiled vehicles, fleet/detail shops, pre-show prep | Contactless dirt removal, time-saving, reduces scratch risk |
| Microfiber Wash Mitt Technique & Straight-Line Pressure | Low-Medium, technique-dependent | Quality microfiber mitts, regular cleaning, two-bucket support | Minimizes swirl marks; efficient dirt removal; maintains gloss | Precision hand-washing for luxury or high-value paint | Lifts dirt rather than drags it; reduces swirl risk; efficient cleaning |
| Spot-Free Drying with Chamois or Microfiber Towels | Low, simple but careful drying skill | Chamois or high-GSM microfiber drying towels, optional blower | Prevents water spots; preserves clarity and hydrophobic performance | Final step after rinse, especially in hard-water/sunny areas | Eliminates mineral deposits; inexpensive protection; quick finish |
| Regular Maintenance Washing Schedule & Contamination Assessment | Medium, requires planning and discipline | Scheduling tools, regular supplies, occasional specialty treatments | Extended coating lifespan; consistent performance; fewer deep cleans | Fleet managers, luxury owners, coastal or high-contamination areas | Proactive protection; cost-effective long-term; tailored treatments |
| Clay Bar Treatment for Contamination Removal Before Main Wash | Medium-High, skill and care required | Clay bars (various grades), clay lubricant/detail spray, time | Removes bonded contaminants; restores smoothness and water-beading | Vehicles with embedded fallout, pre-coating preparation, long-neglected cars | Removes contaminants regular wash can't; improves coating adhesion and gloss |
Book Your Ceramic-Safe Service
Keep the Beading: Your Ceramic-Coating Care Plan
The cleanest answer to How to Wash a Ceramic Coated Car? is still the same in every serious workshop, use a gentle two-bucket wash for routine dirt, add foam pre-washing when contamination is heavier, dry the car immediately, and leave clay work or correction to the surfaces that need it. That sequence keeps the coating doing what it was meant to do, which is stay slick, keep beading, and make future washes easier instead of harder.
The trade-offs are straightforward. Faster methods usually mean more friction, more residue, or more spotting, while slower hand care protects the coating and the paint underneath it. Australian aftercare guidance consistently points the same way, hand wash, microfiber tools, pH-neutral shampoo, and careful drying are the safe habits, while brushes, harsh detergents, and abrasive pressure are the habits that shorten coating life.
If your car is showing reduced beading, stubborn contamination, or water spotting that won’t clear with a careful rinse, that’s the point to step up from DIY to professional hand care. For Perth and Westminster drivers, Prime Shine Hand Car Wash can support that with hand washing, Mini Car Detailing, Full Car Detailing, Cut & Polish, and Ceramic Coating, all from its Westminster site with online booking and clear service options.
Prime Shine Hand Car Wash helps Perth drivers keep ceramic-coated cars clean with hand washing, detailing, paint correction, and paint protection. If your coating needs a safe wash or a proper maintenance reset, visit Prime Shine Hand Car Wash and book the service that matches the condition of your paint.